Stake with the Staking Portal
The Autonomys Staking Portal is the easiest way to stake (nominate) your AI3 to an operator and start earning rewards. It guides you through choosing an operator, entering an amount, and signing the transaction - without needing to construct extrinsics manually. Recommended
If you'd rather submit the staking extrinsics yourself, see the Stake with the Substrate Portal guide instead.
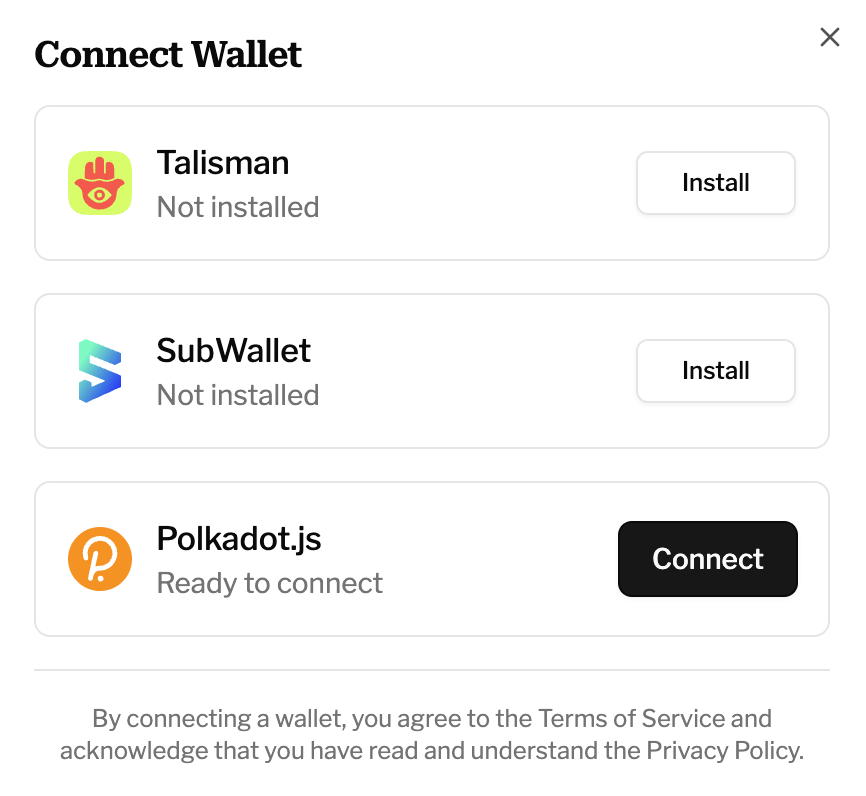
Staking takes place on the Autonomys consensus chain and requires a Substrate wallet - SubWallet, Talisman, or the Polkadot.js extension. MetaMask and other EVM-only wallets are not supported.
If your AI3 is on Auto EVM, first bridge it to the consensus chain using XDM (this takes ~1 day). Keep a small amount of AI3 unstaked to cover transaction fees.
How staking works
A few things worth knowing before you stake:
- Storage fund reserve. When you stake, 80% of your deposit becomes your stake and 20% is reserved in the operator's storage fund, which pays for the data bundles the operator produces. The reserve is not lost - it is refunded proportionally when you withdraw.
- Epochs. Staking operations are processed in epochs (every 100 domain blocks, roughly 10 minutes). Your deposit sits in a pending queue until the next epoch transition, when it converts to shares in the operator's nomination pool and starts earning.
- Rewards compound automatically. There is nothing to claim while you remain staked - your share of the operator's earnings (after the operator's nomination tax) accrues to the value of your position and is paid out when you withdraw.
- Nomination tax. The nomination tax is the commission an operator takes from rewards before distributing the remainder to its nominators, shown as a percentage on each operator card.
Staking
Follow these steps to stake (nominate) your AI3 to an operator and start earning rewards.
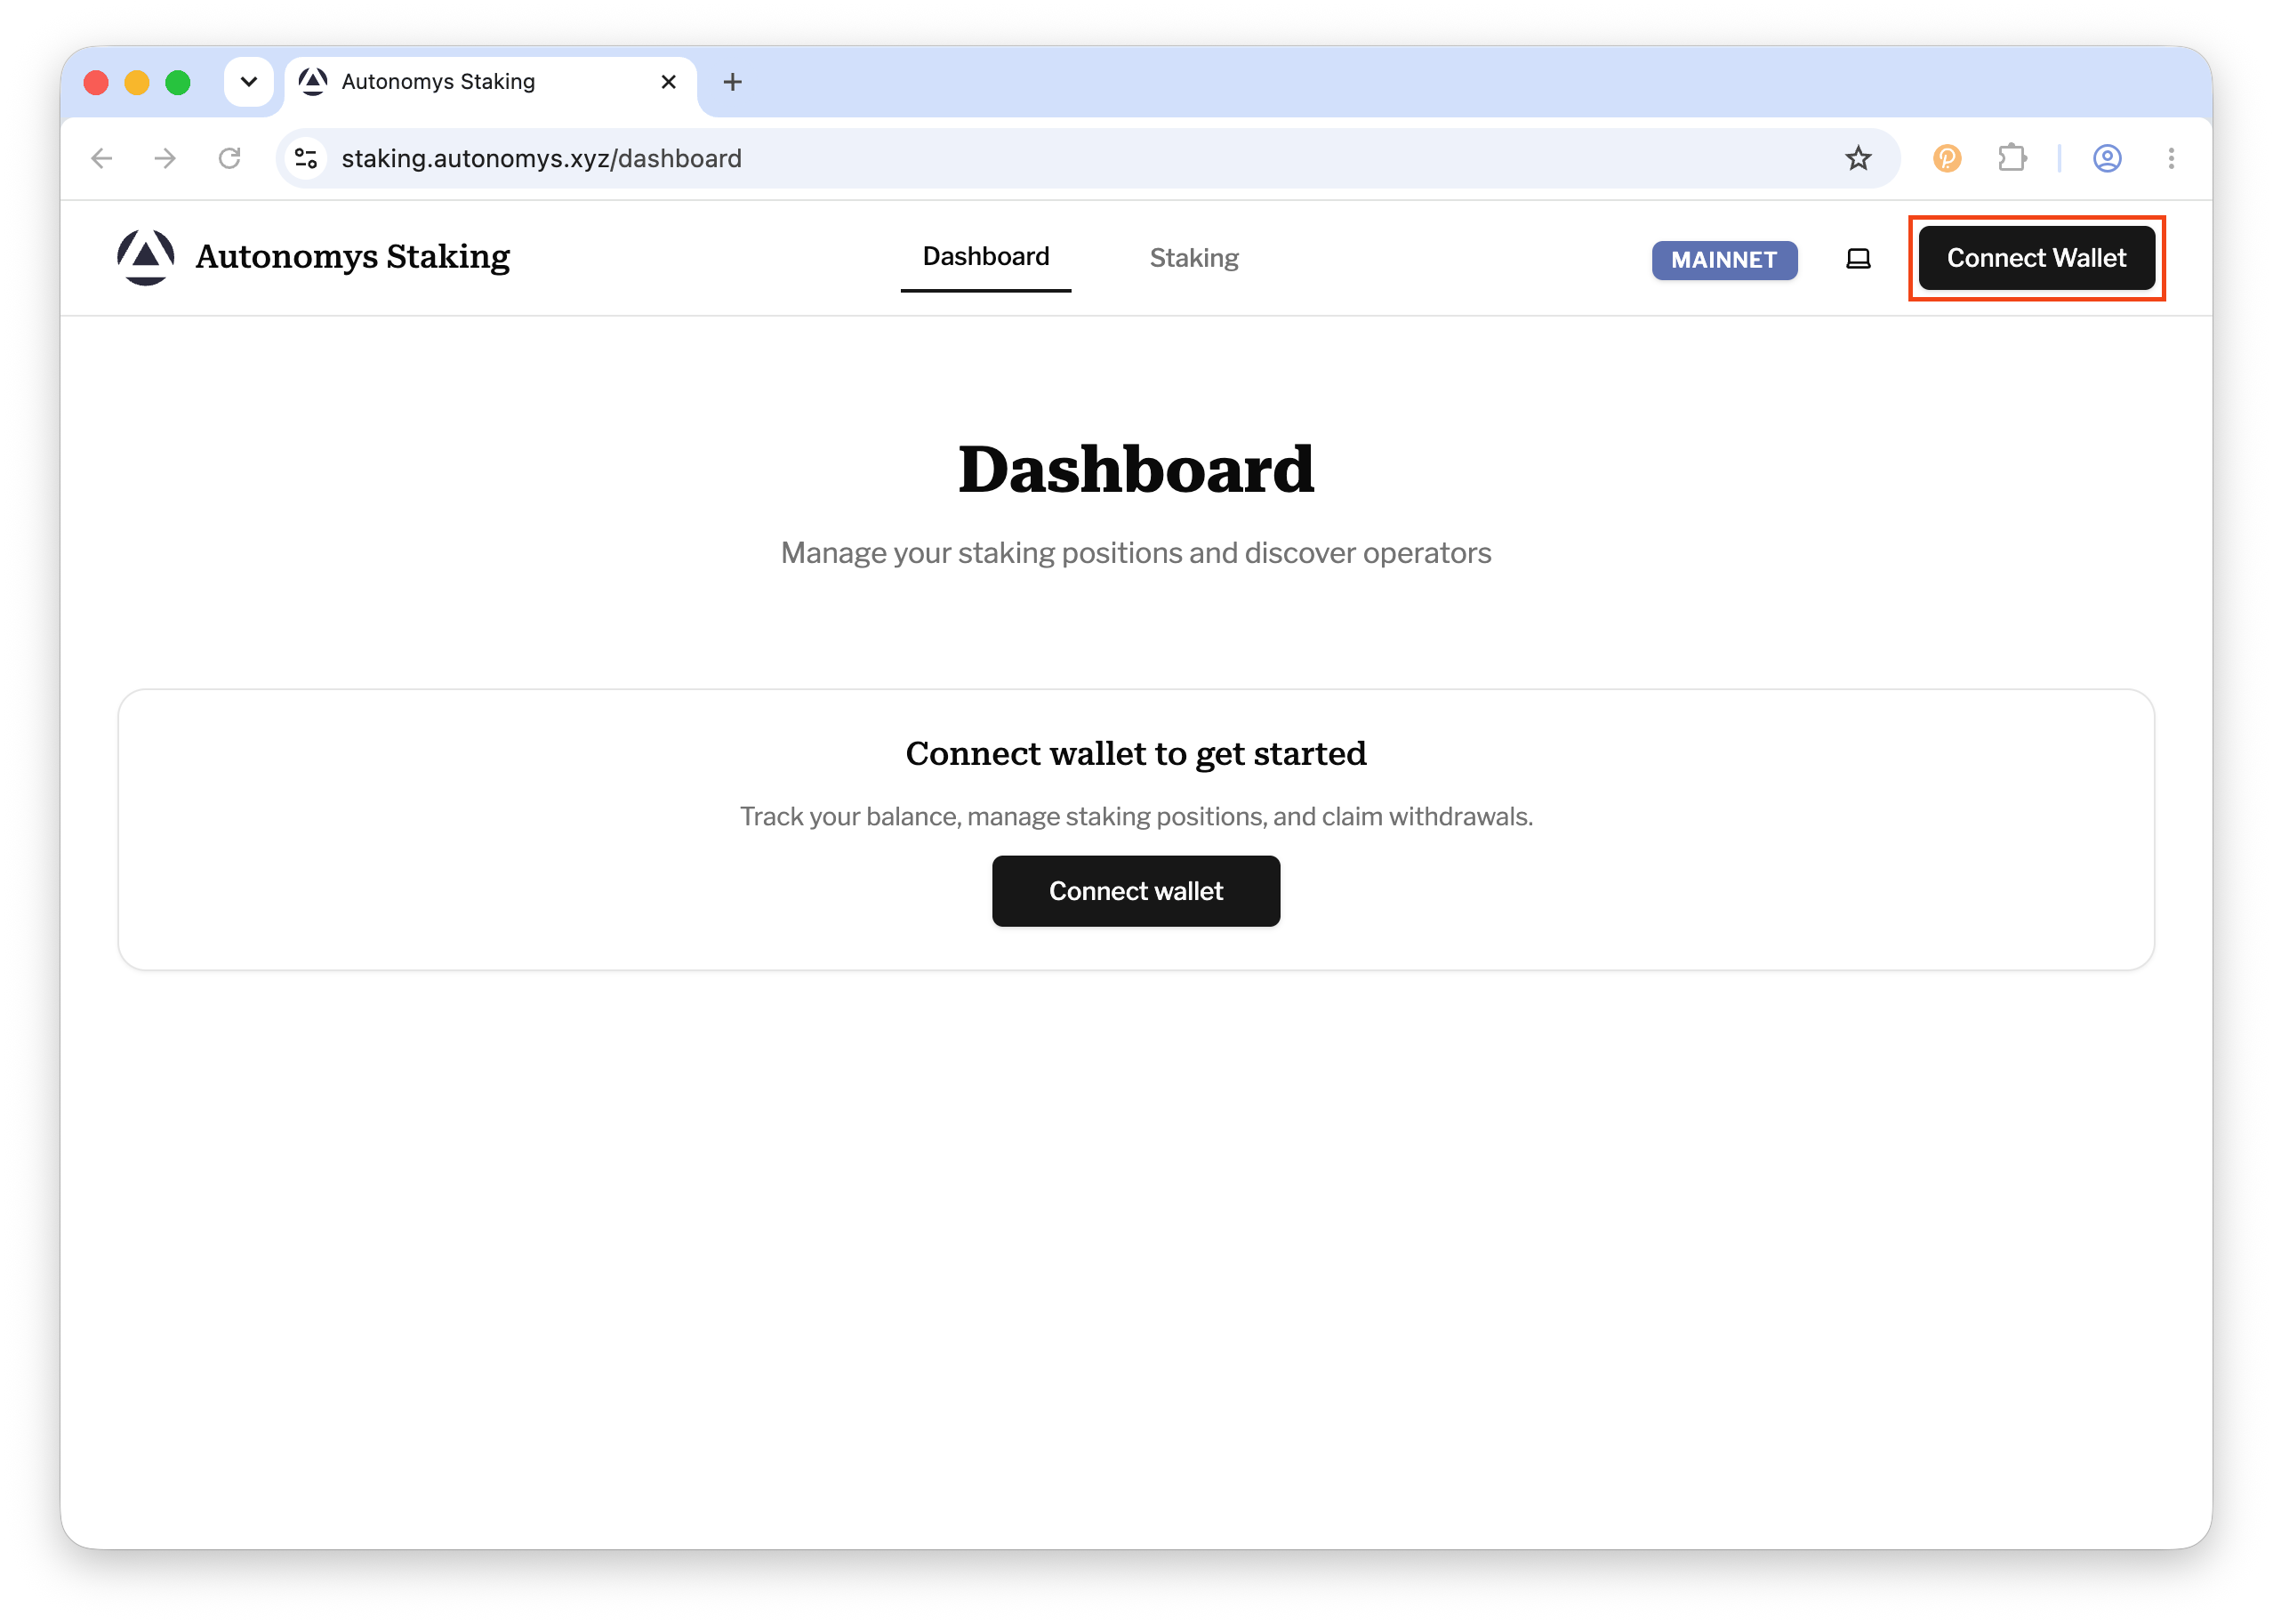
Step 1: Connect your wallet
Go to staking.autonomys.xyz and click Connect Wallet in the top right. Choose your Substrate wallet extension (SubWallet, Talisman, or Polkadot.js), approve the connection request in the extension popup, and select the account holding your AI3.
Connect Wallet
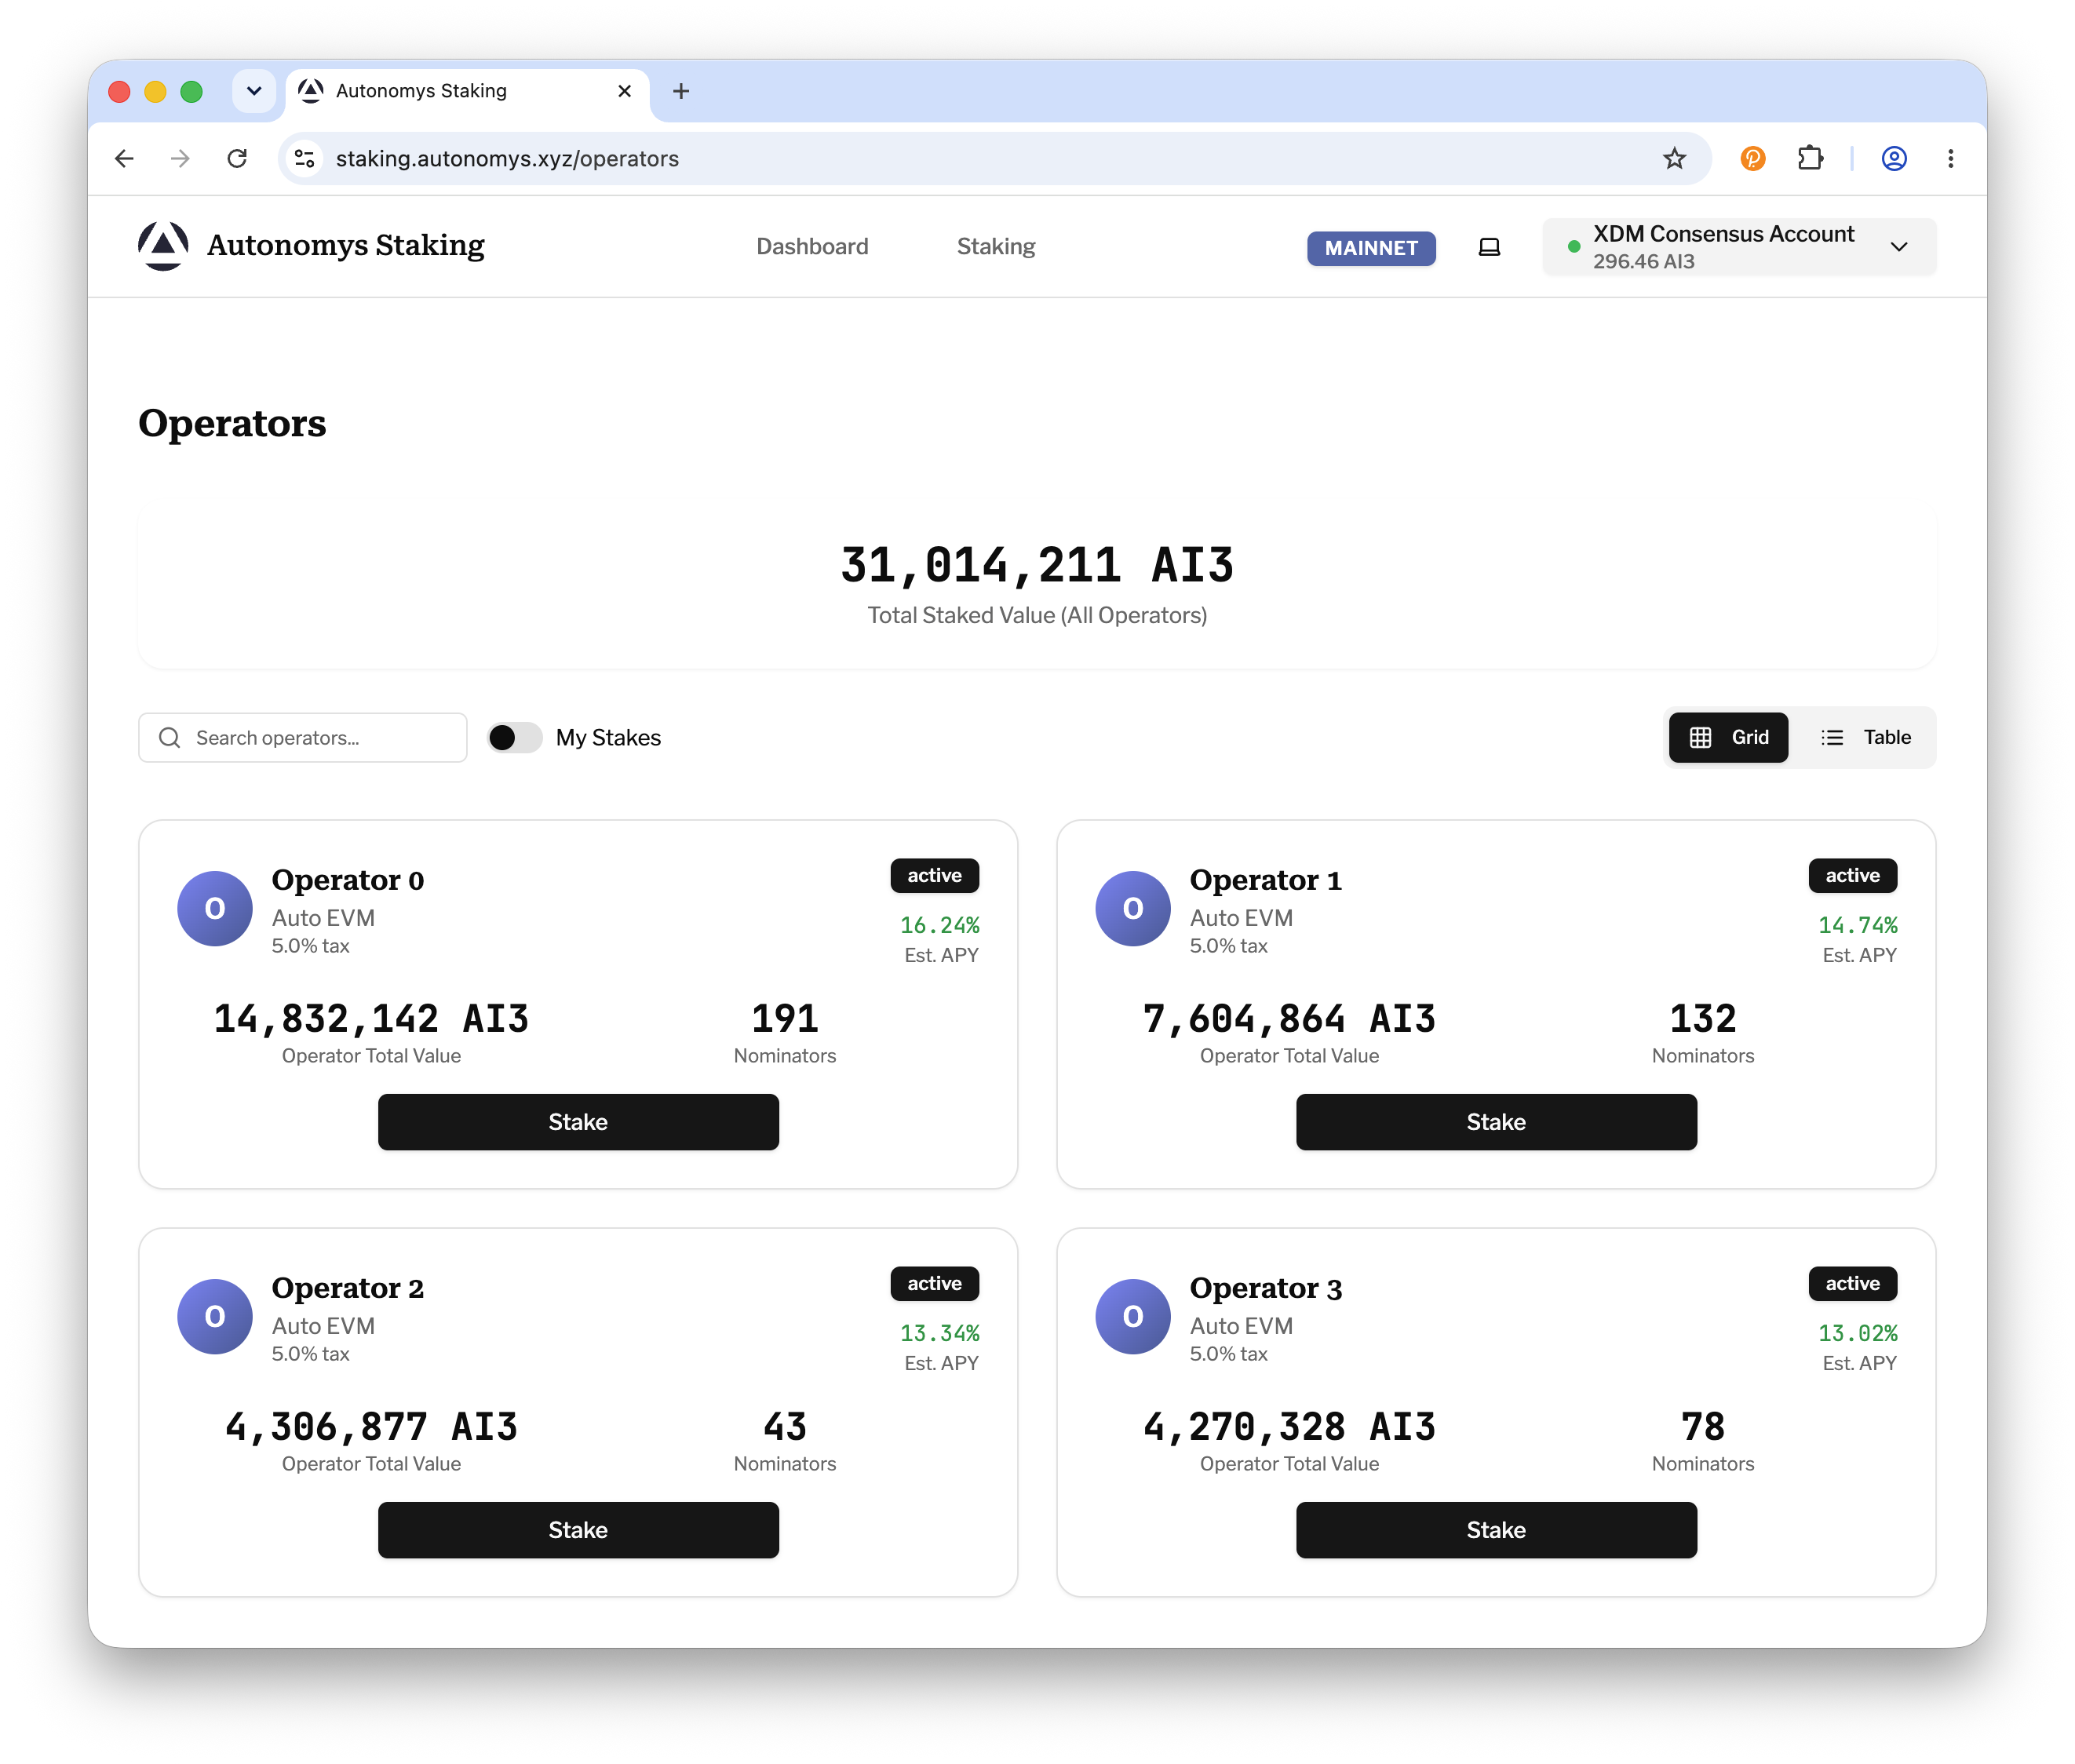
Step 2: Browse the operators list
Open the Operators page using the Staking link in the top navigation. Each operator shows its nomination tax, estimated APY, total staked value, nominator count, and status. Use the search box or switch between grid and table views to compare operators.
Operators List
Step 3: Choose an operator and click "Stake"
Click Stake on the operator you want to nominate. You'll be taken to that operator's staking page (headed "Stake to" followed by the operator's name), which shows a summary of the operator alongside the staking form.
Stake Page
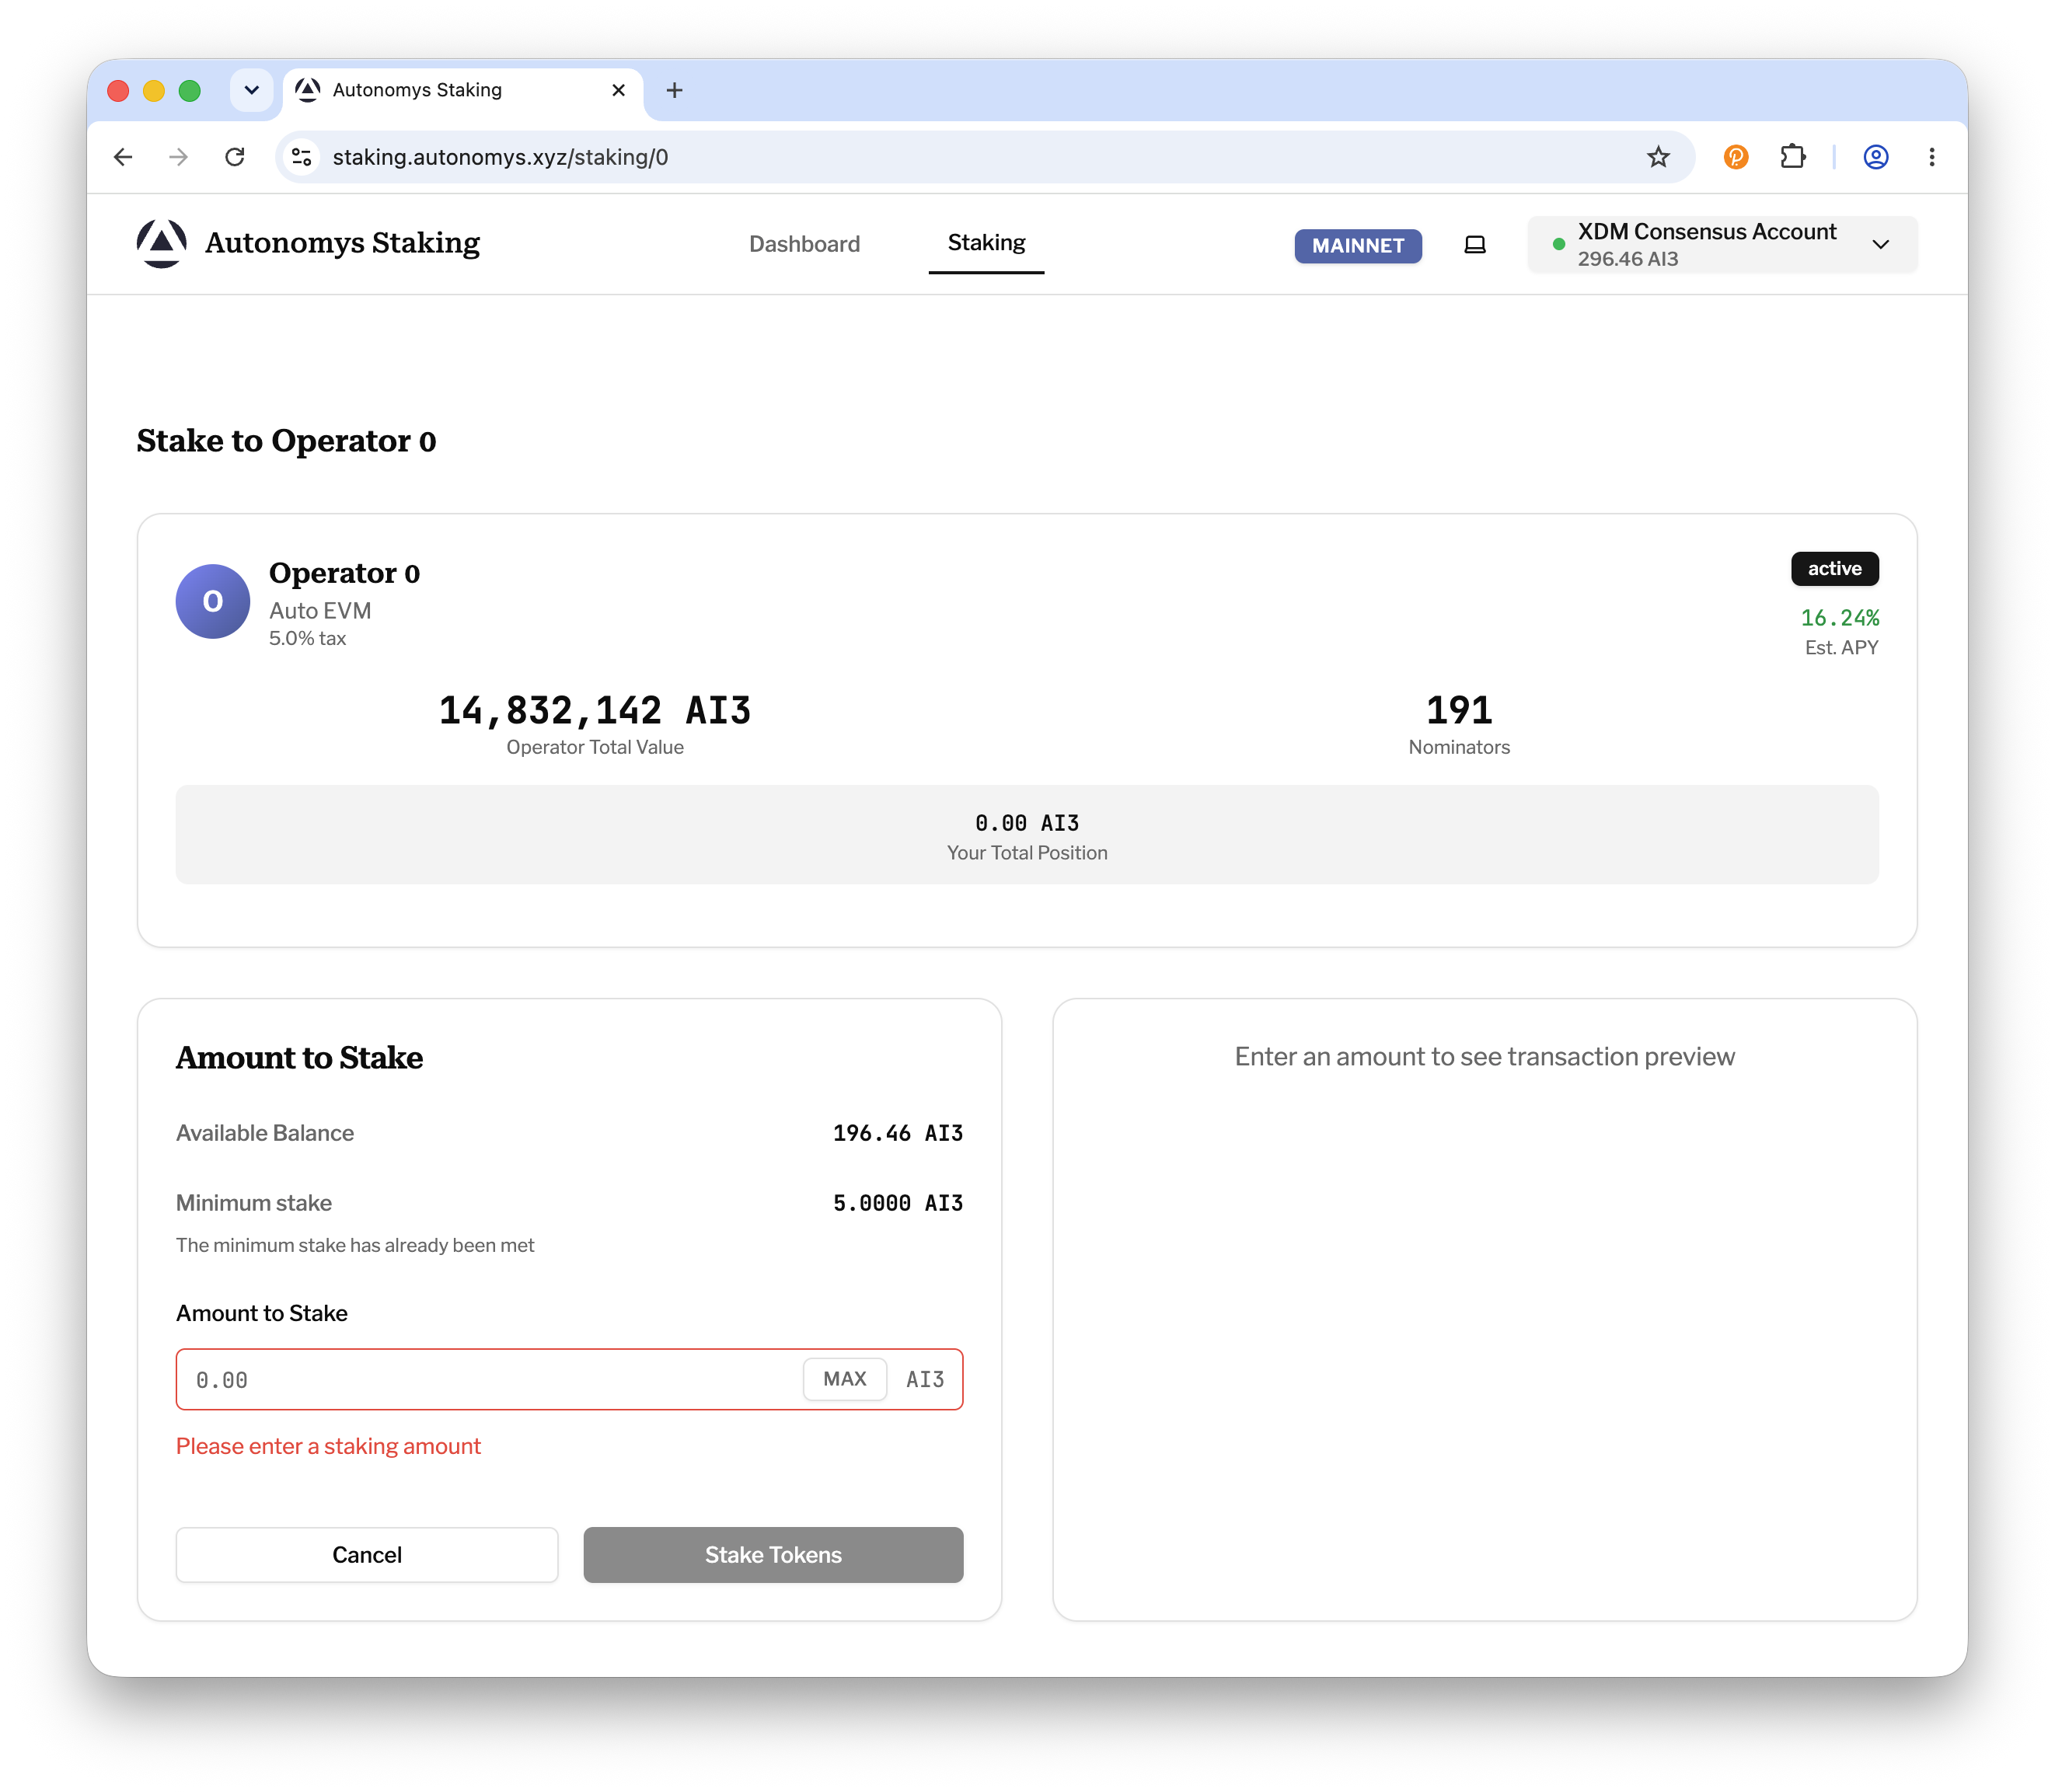
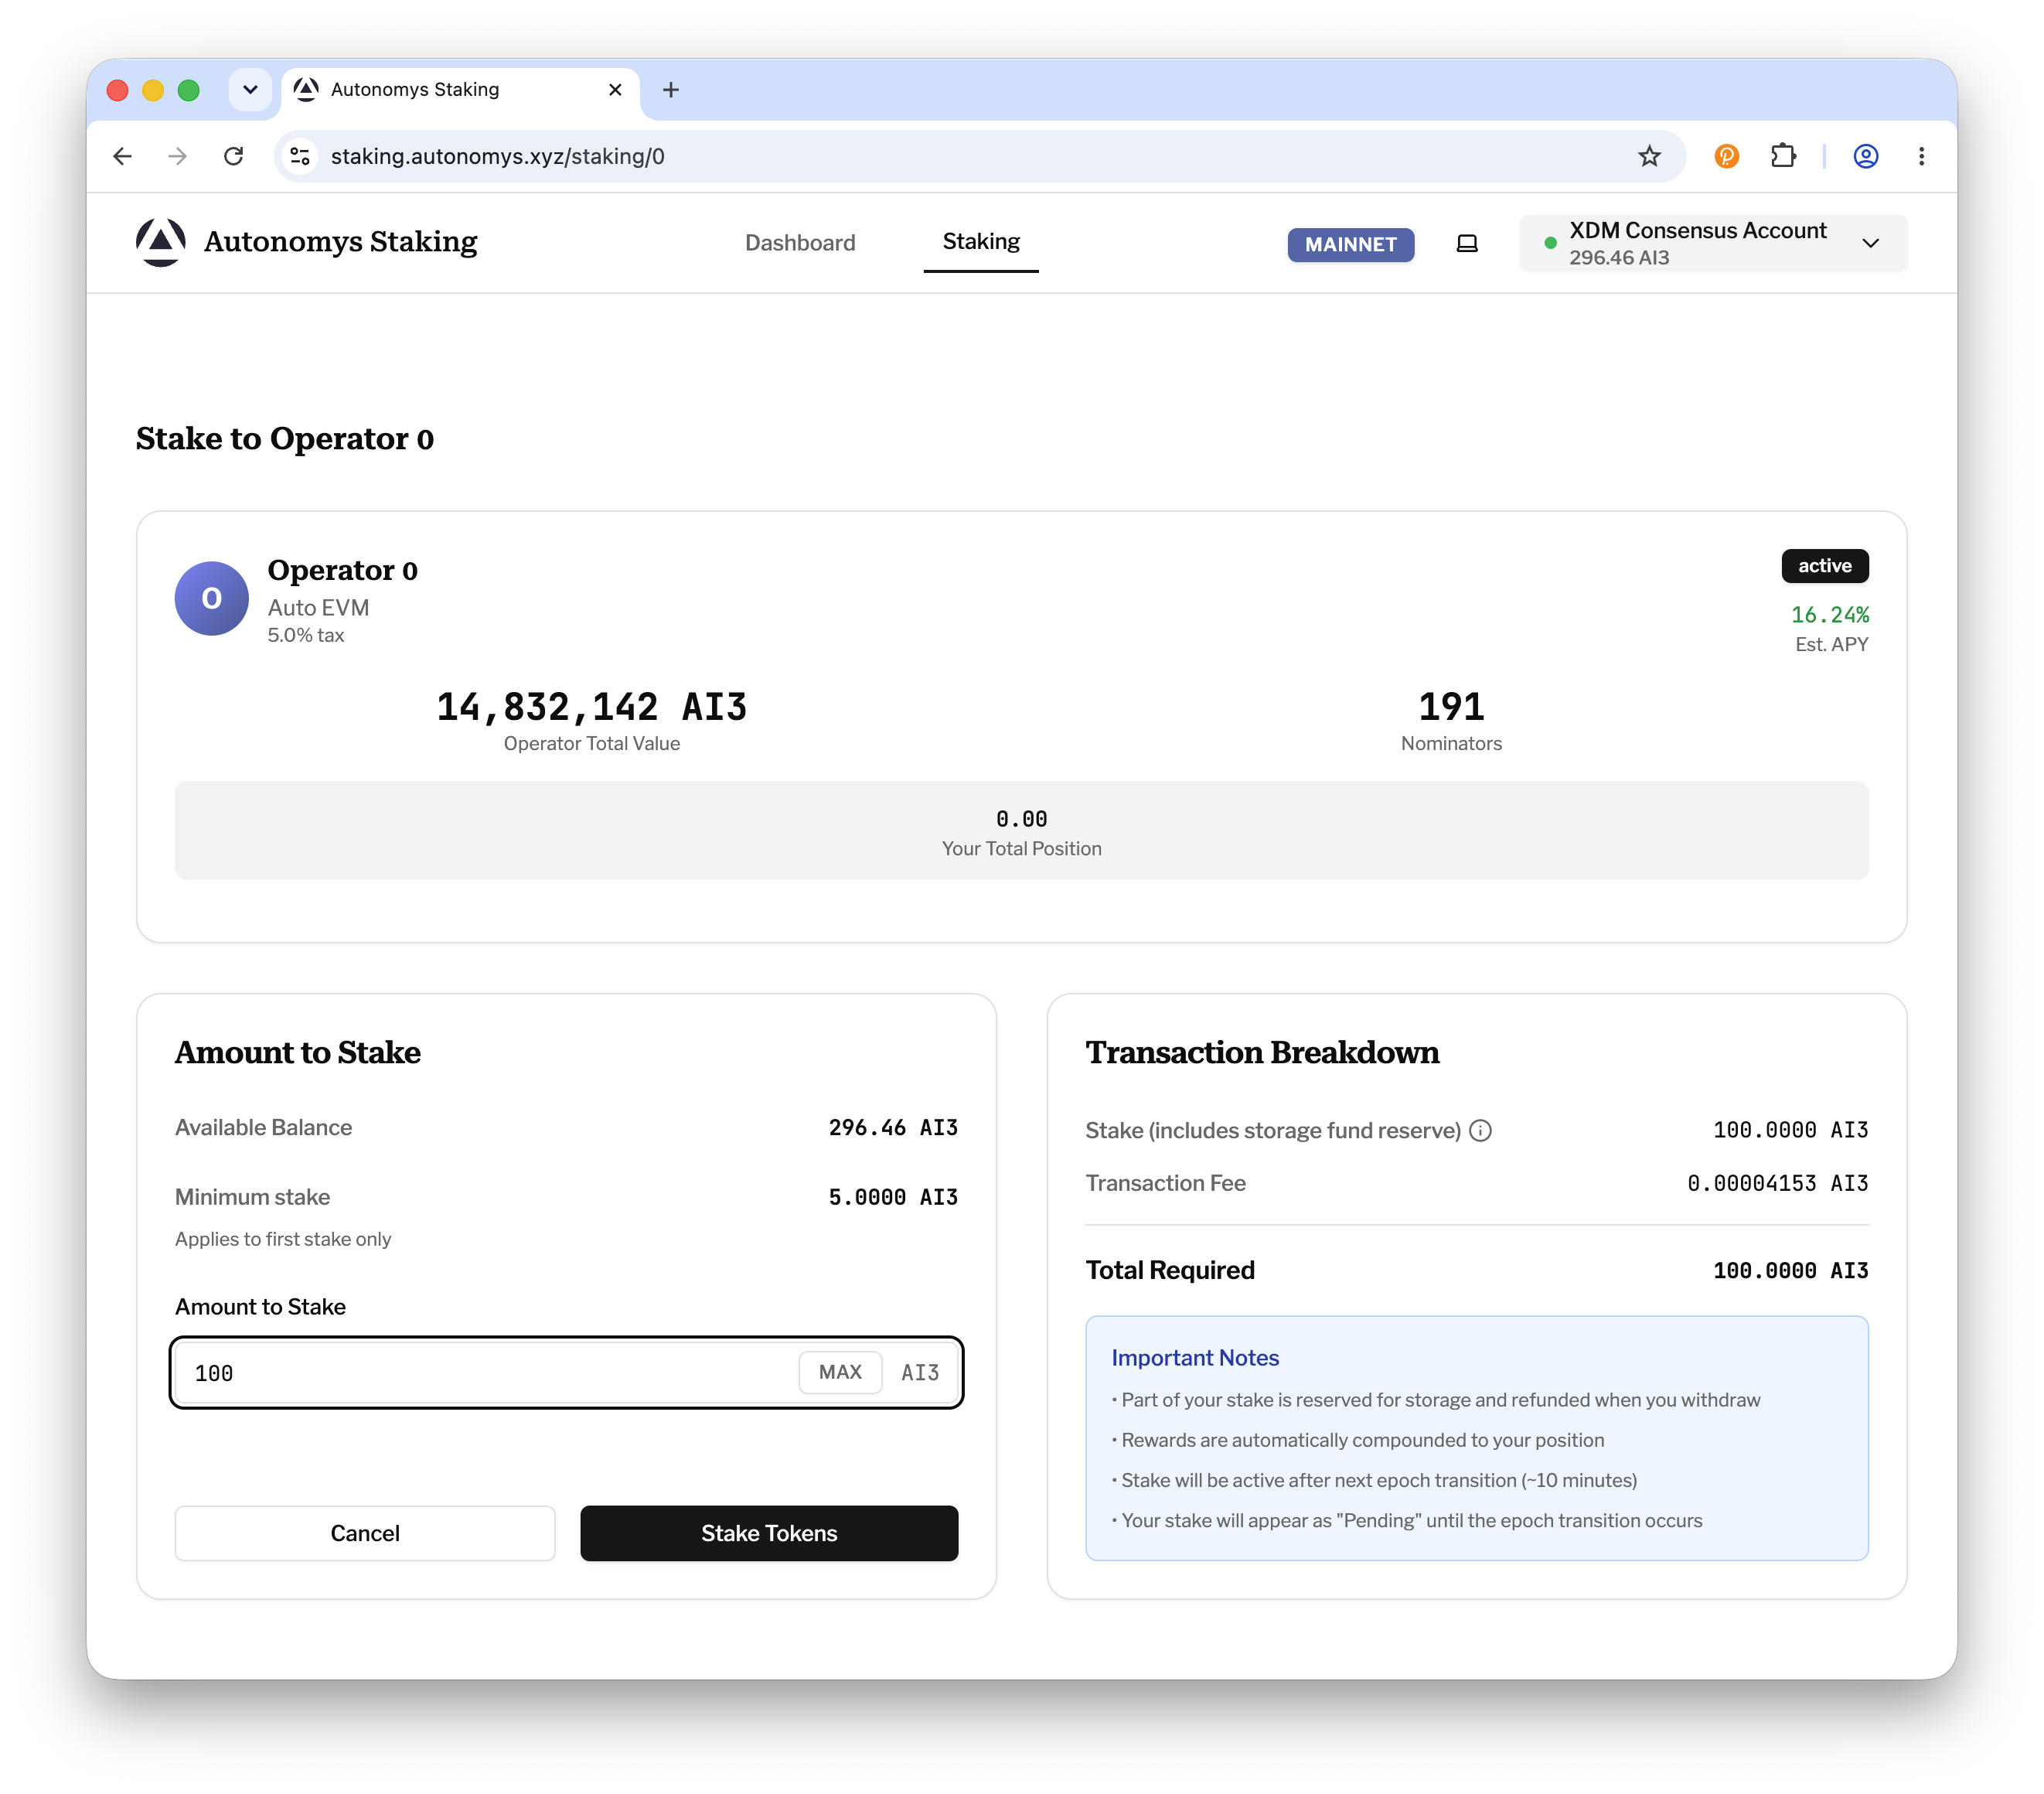
Step 4: Enter the amount to stake
Enter the amount of AI3 in the Amount to Stake field, or click MAX to stake your full available balance (a small buffer is kept back for transaction fees). The form shows the operator's minimum stake, which applies to your first stake only.
The Transaction Breakdown shows how your deposit is split: 80% becomes your stake and 20% is reserved in the operator's storage fund (refunded proportionally when you withdraw).
Amount & Transaction Breakdown
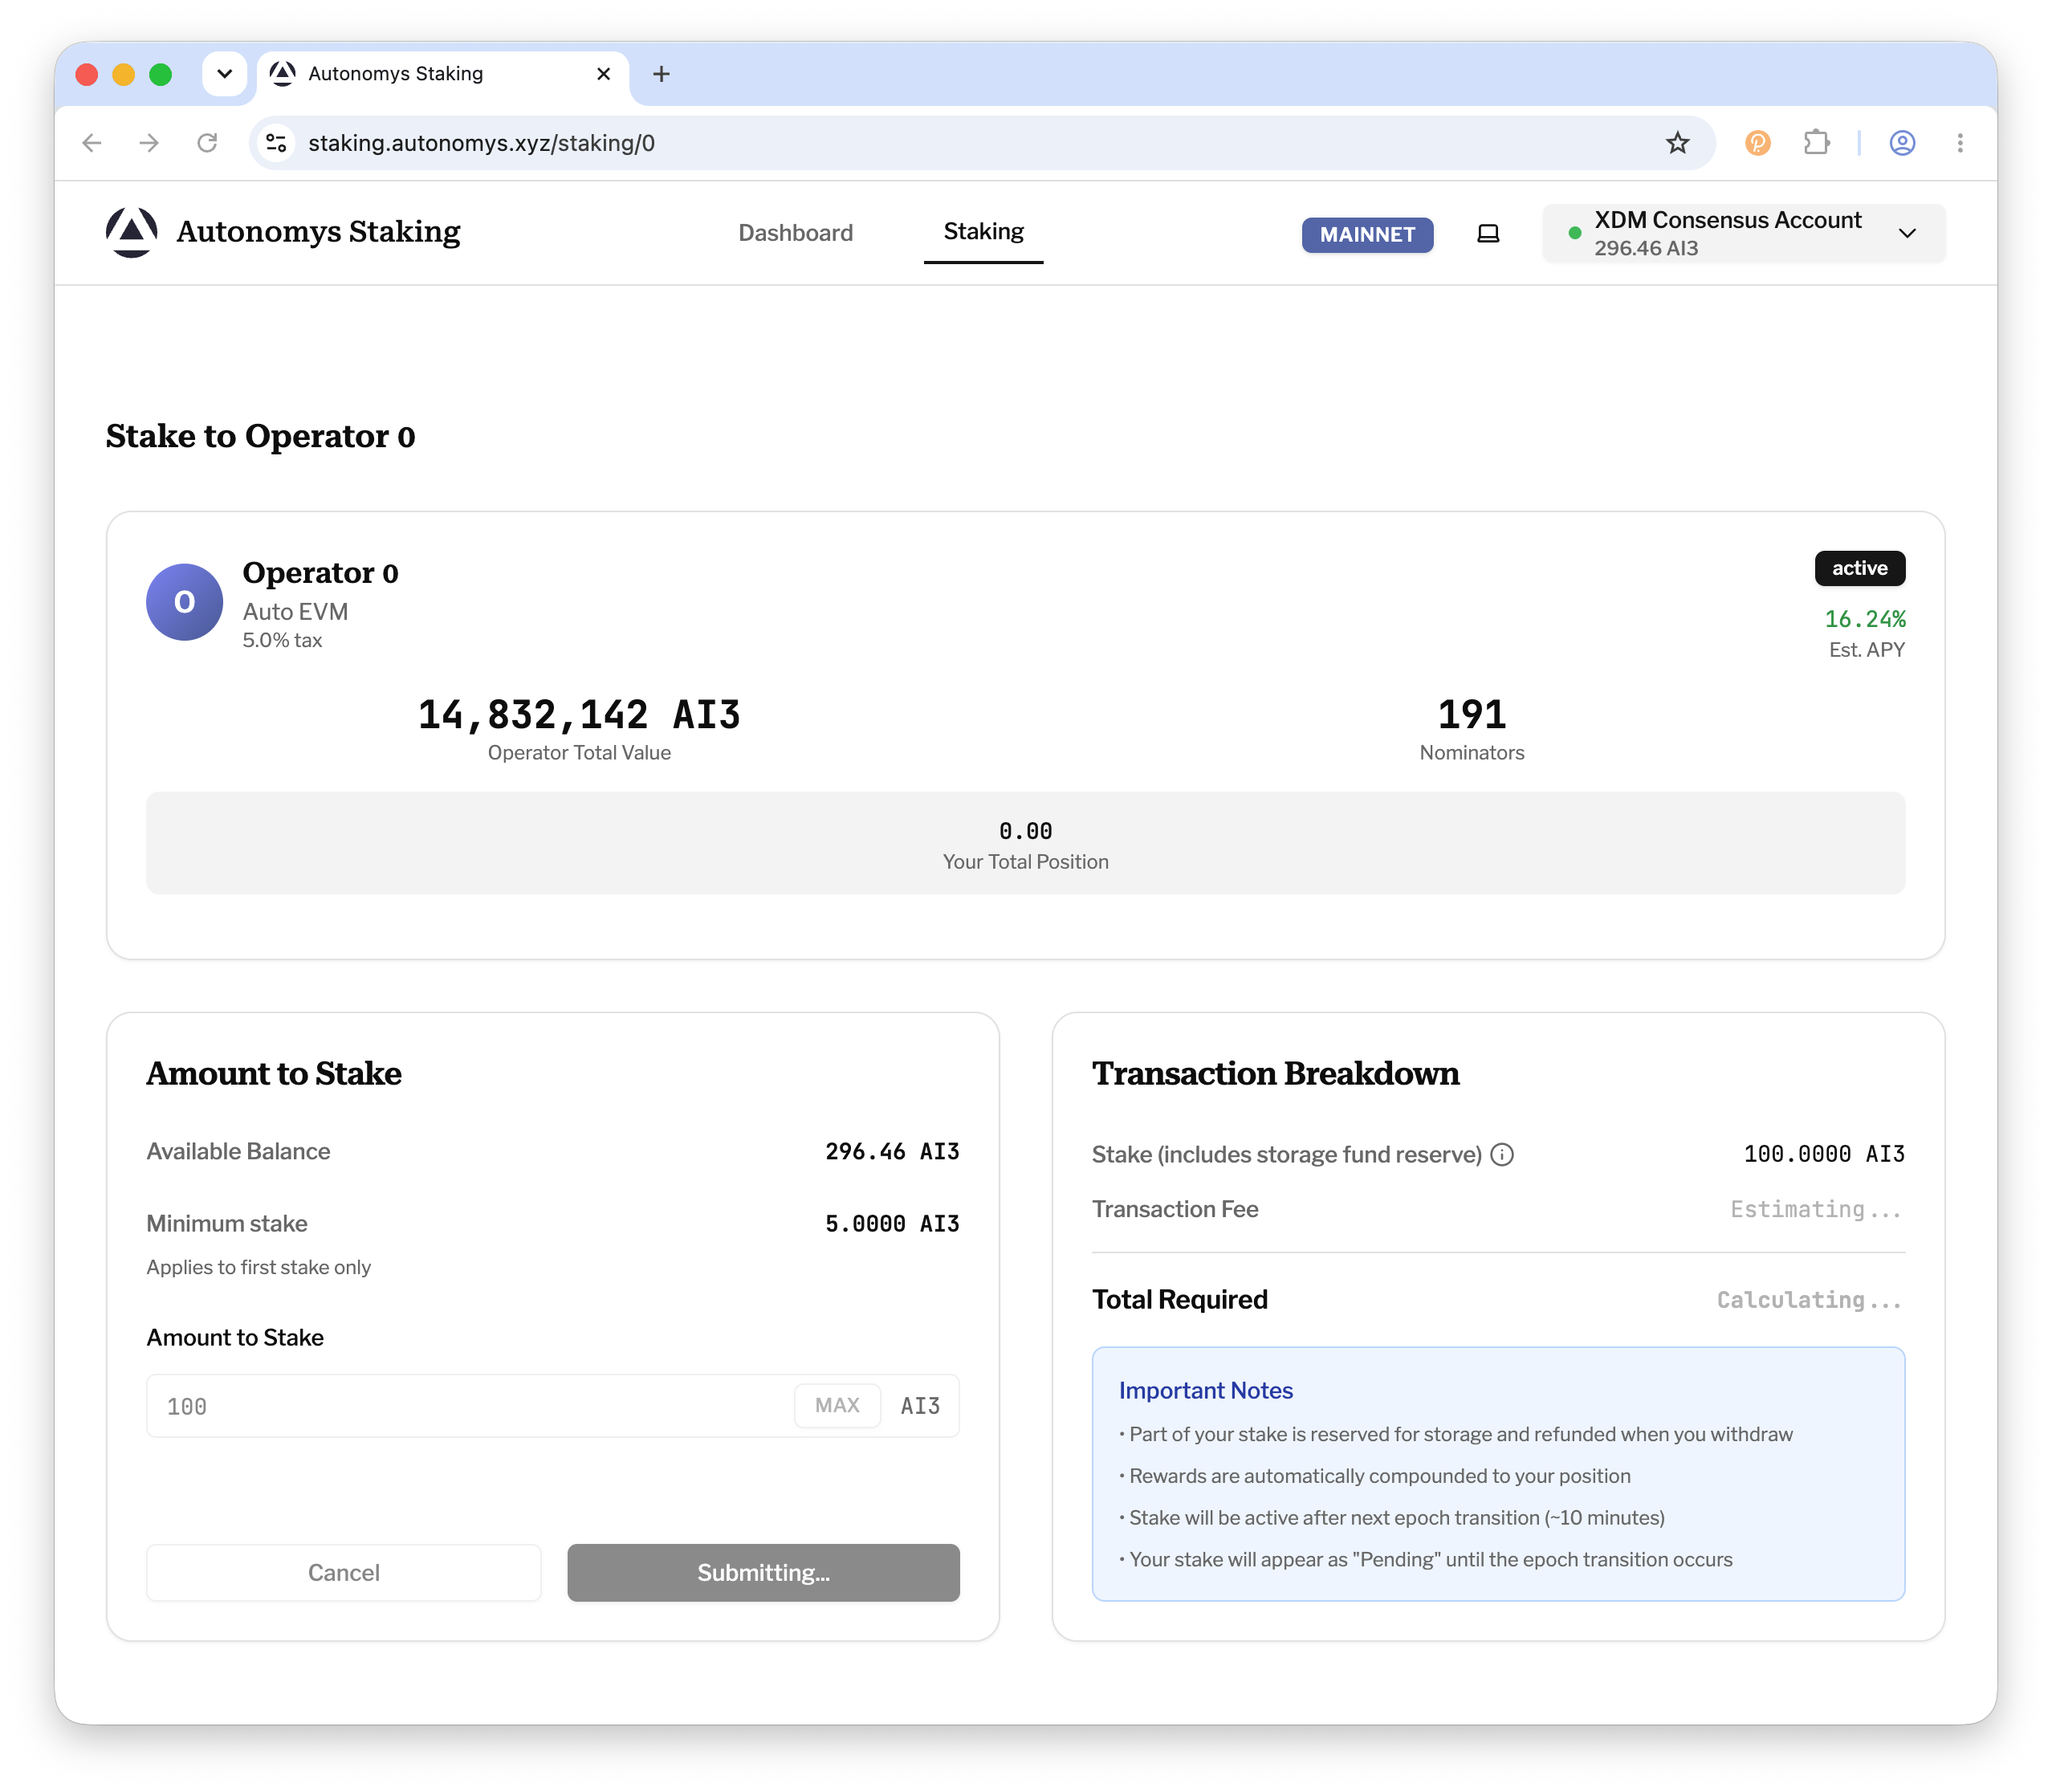
Step 5: Submit and sign the transaction
Click Stake Tokens. Your wallet extension will pop up asking you to sign the transaction - review the details and approve. The button shows Awaiting signature... and then Submitting... while the transaction is broadcast.
Sign Transaction
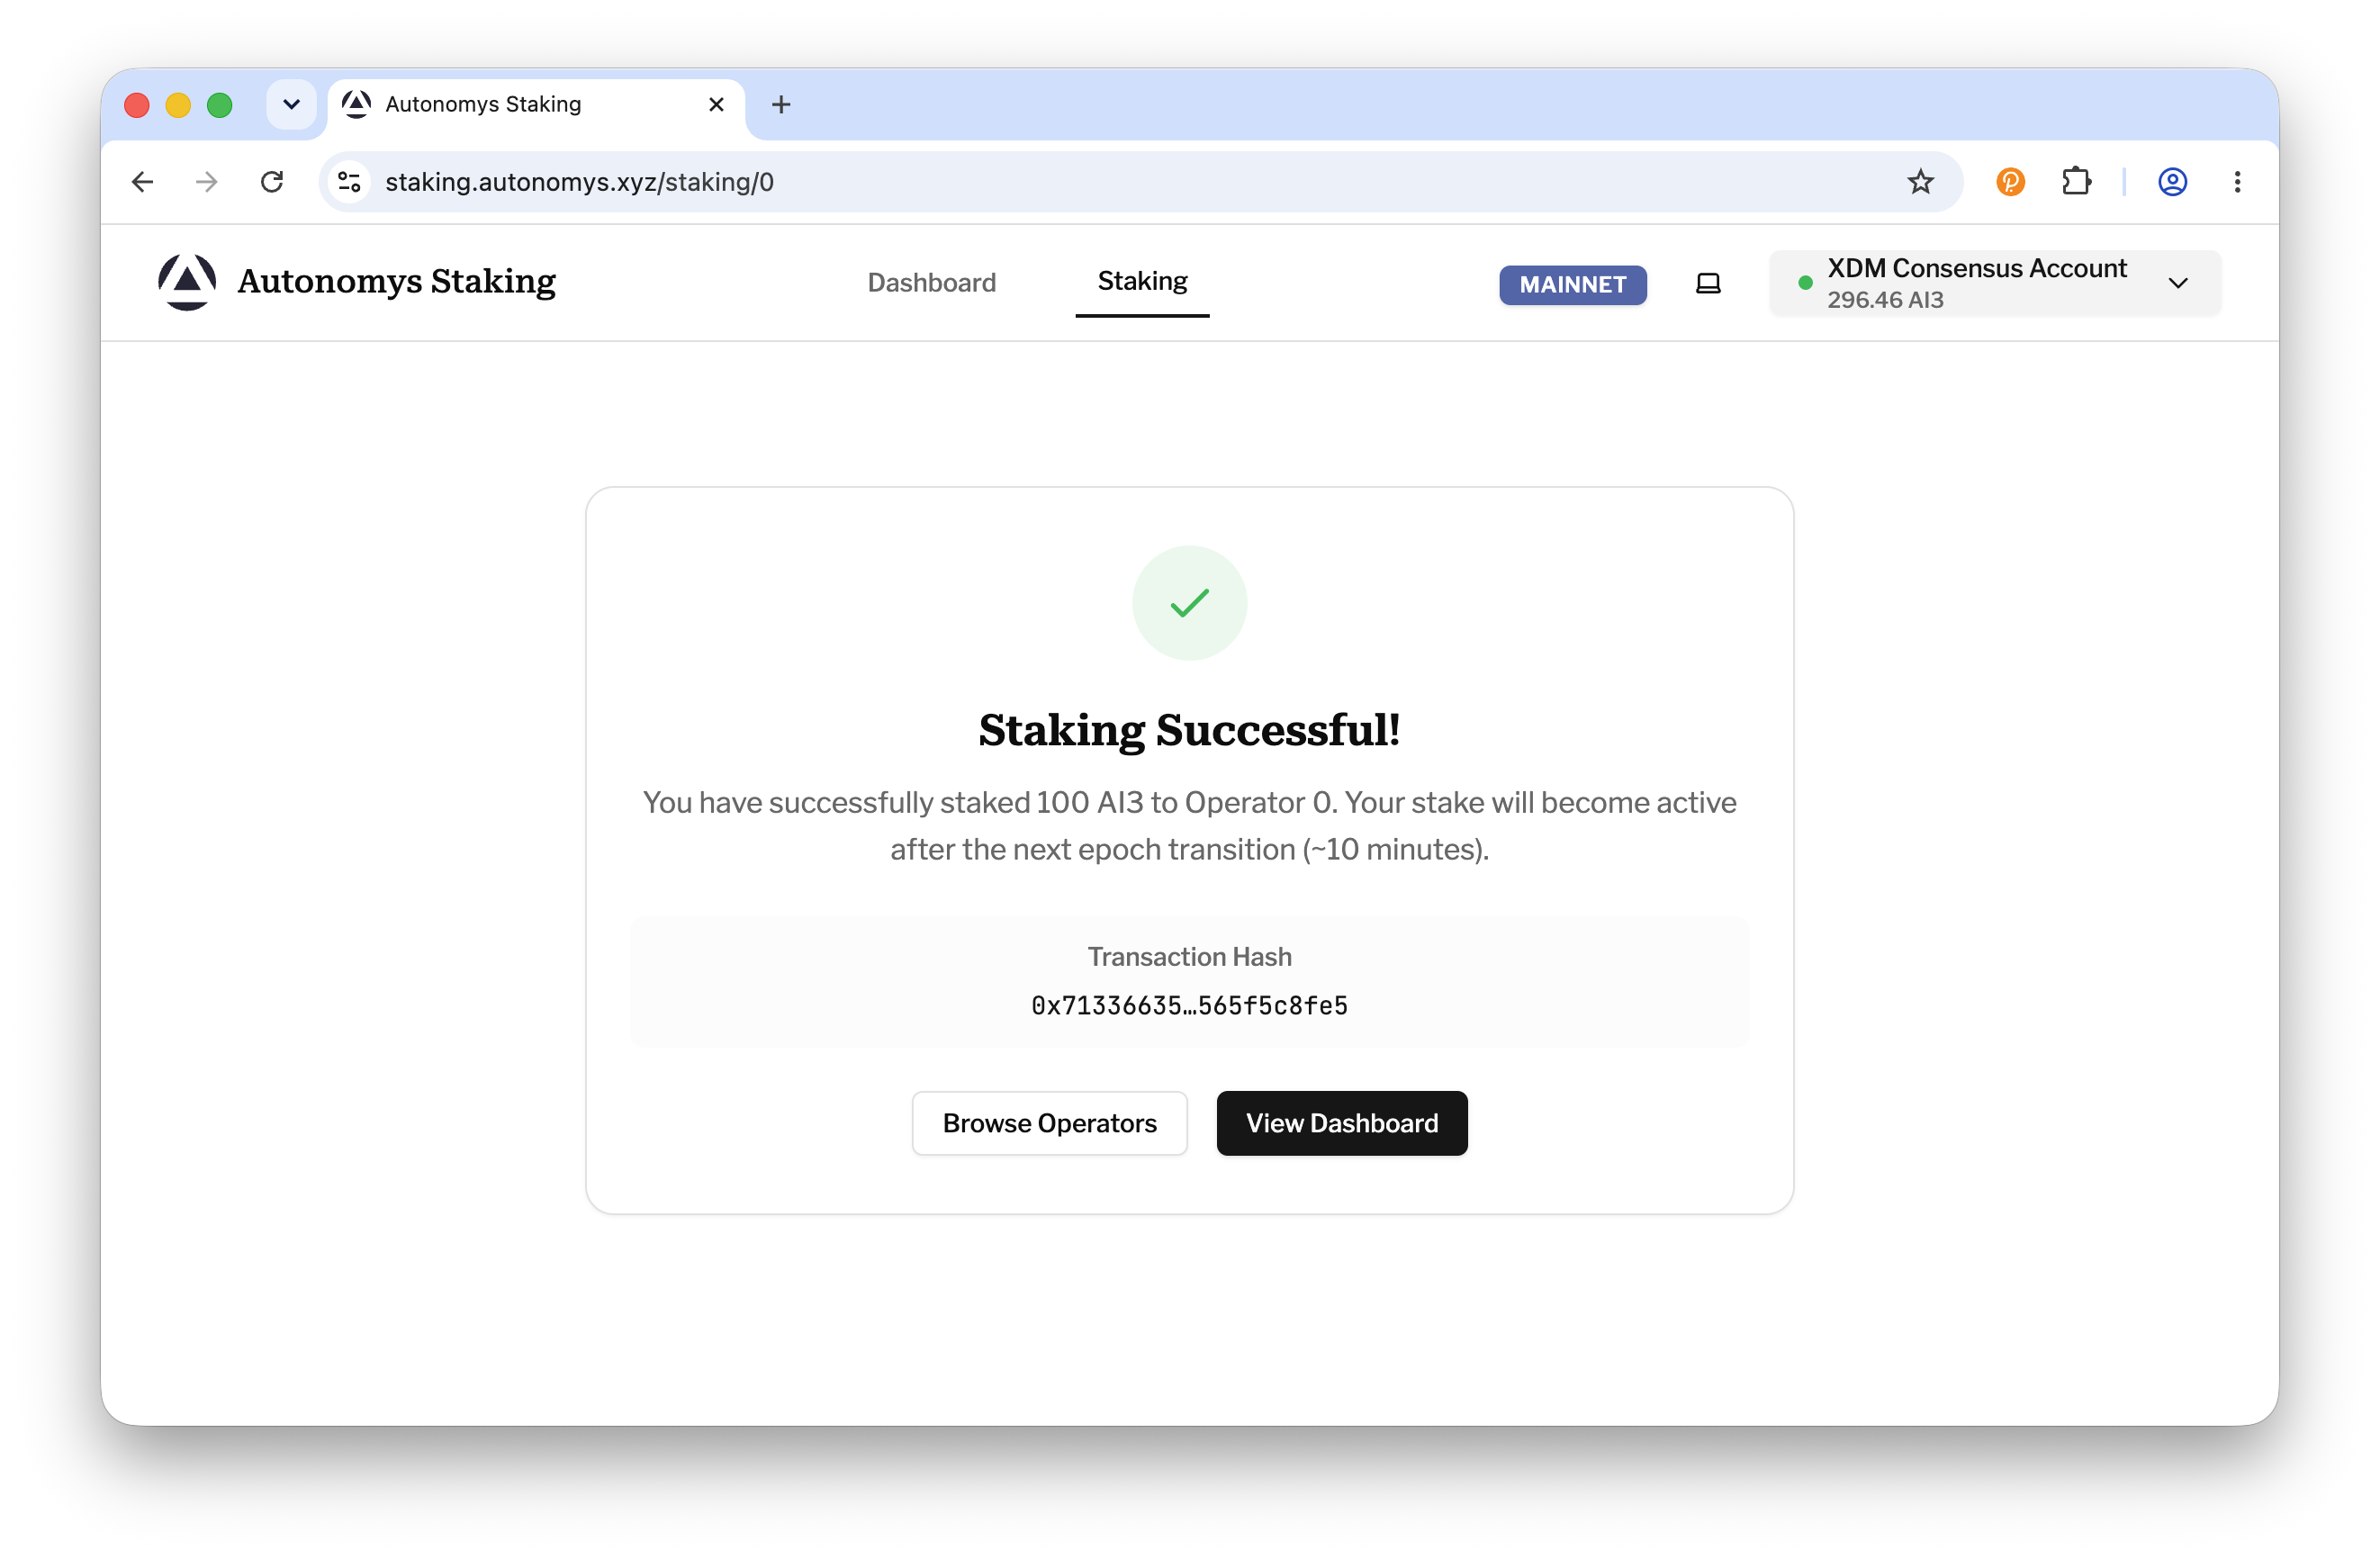
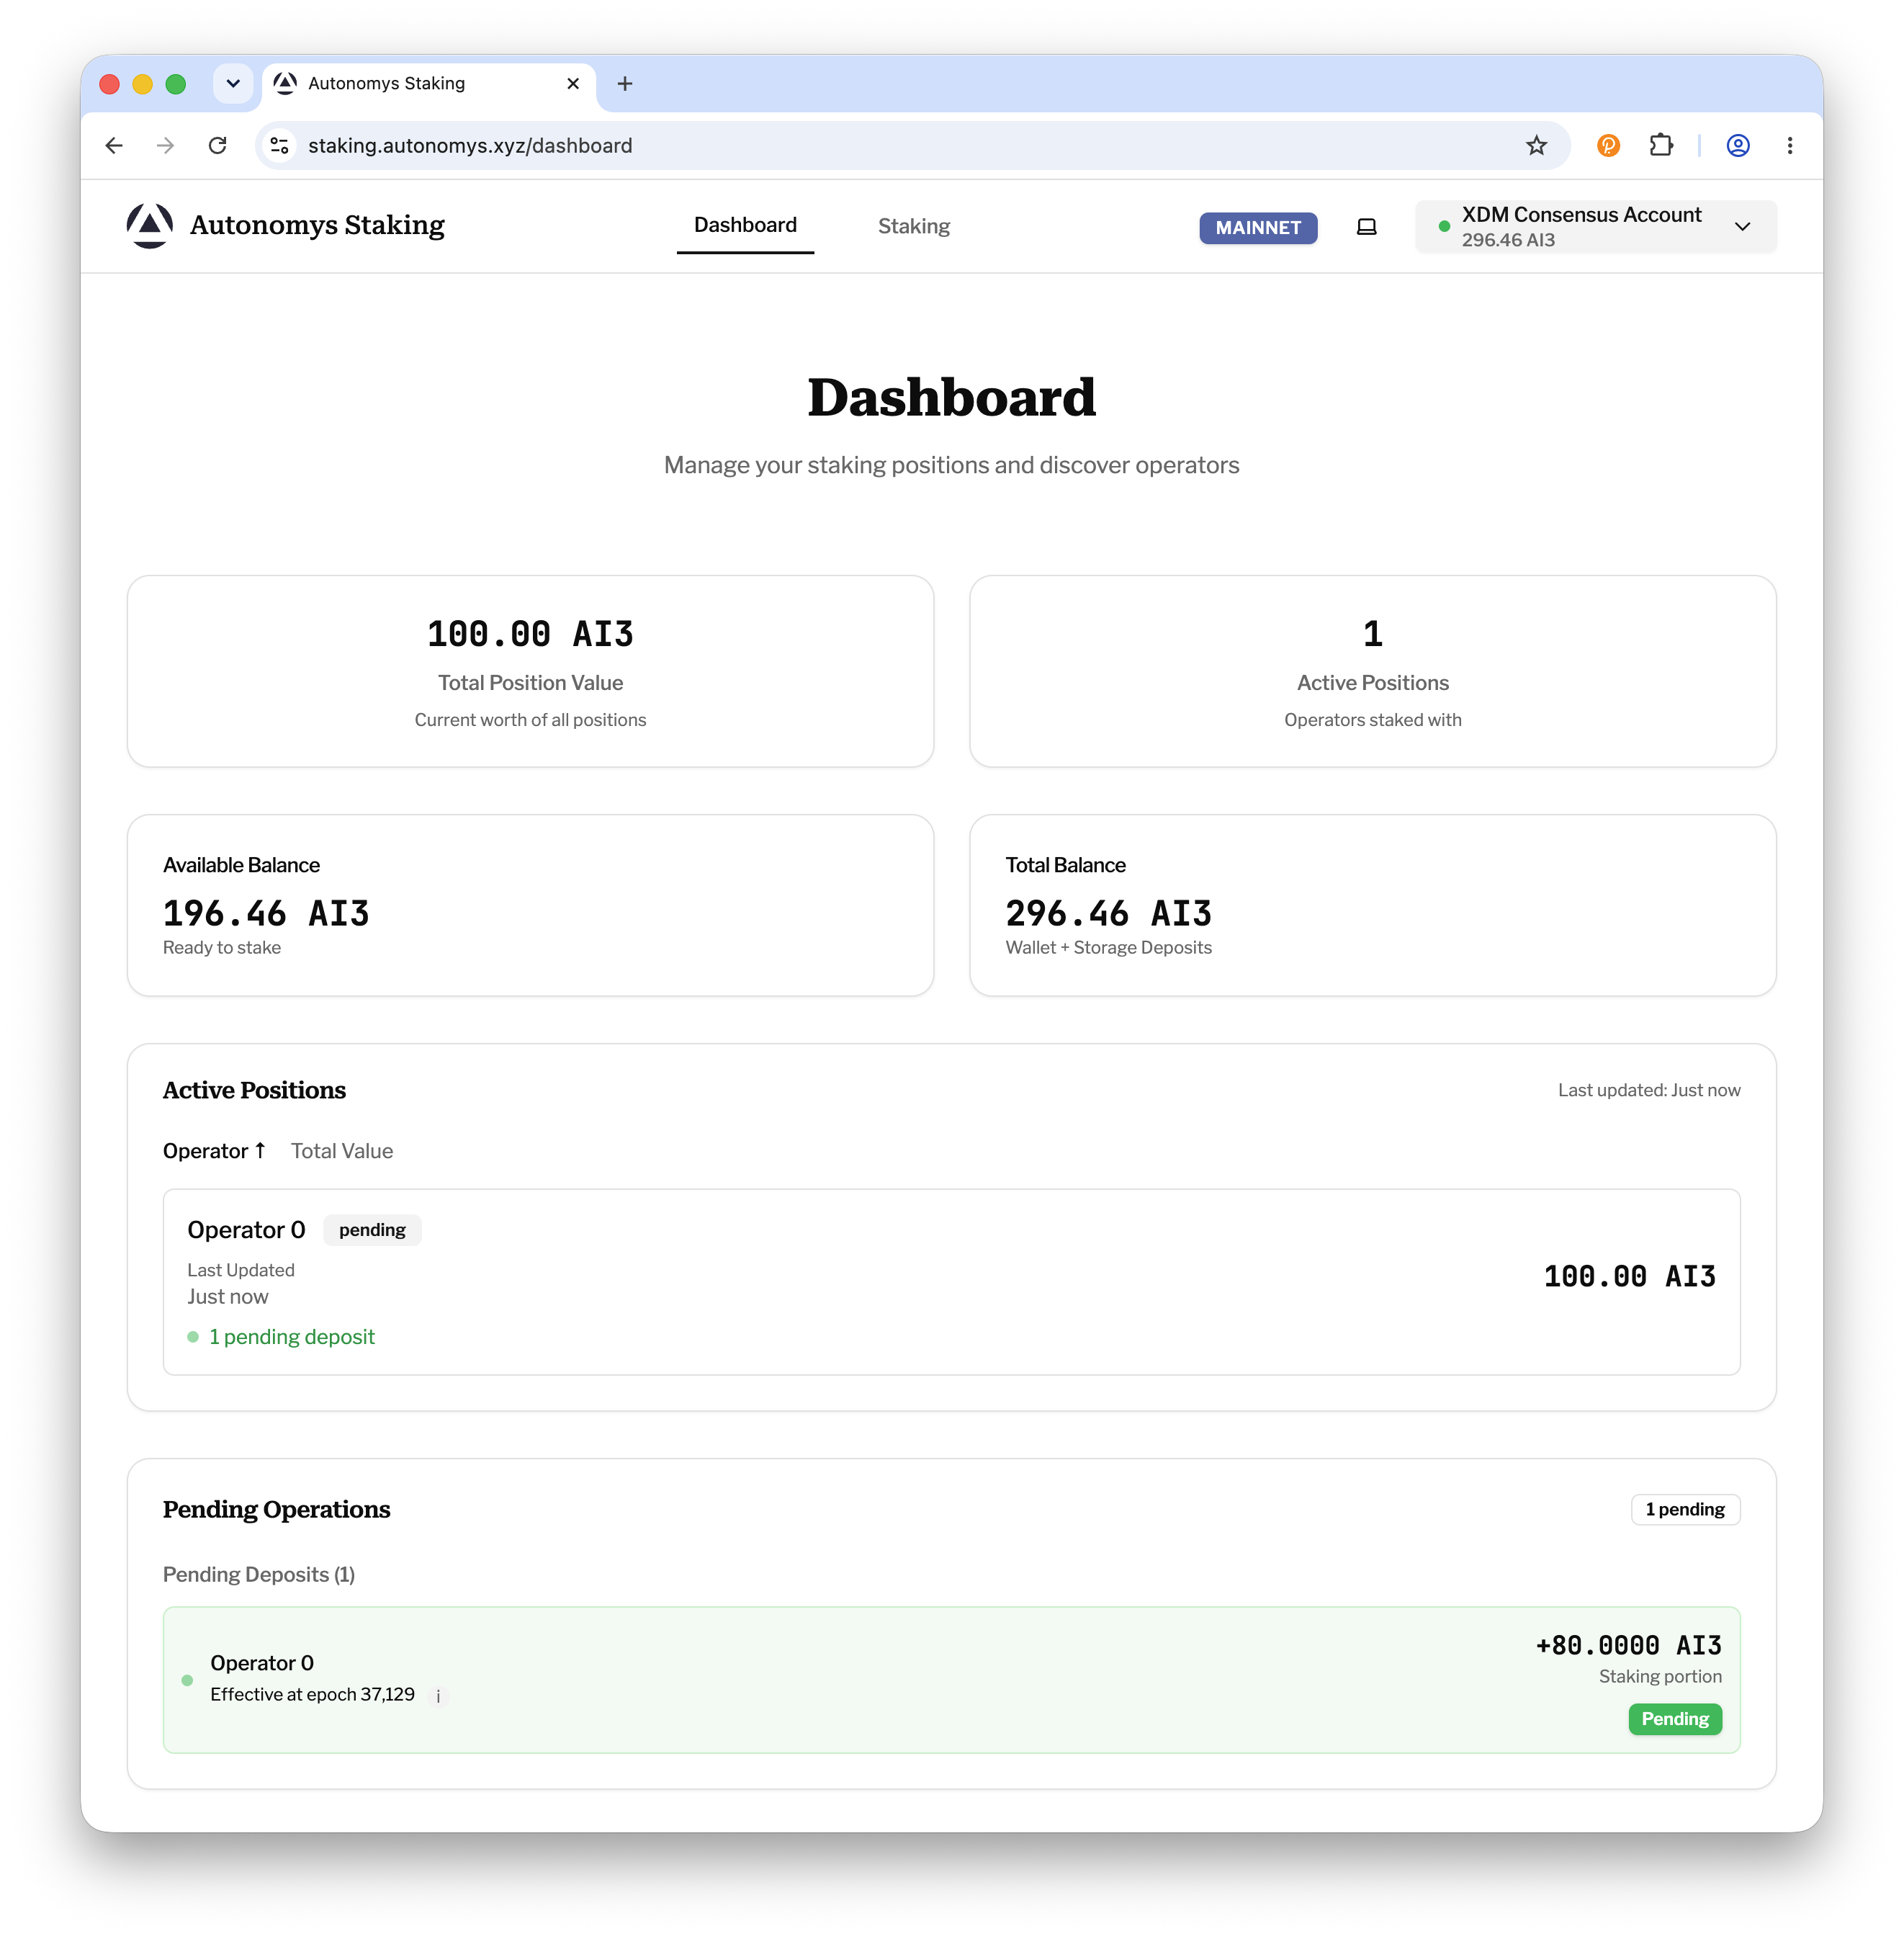
Step 6: Confirmation and epoch activation
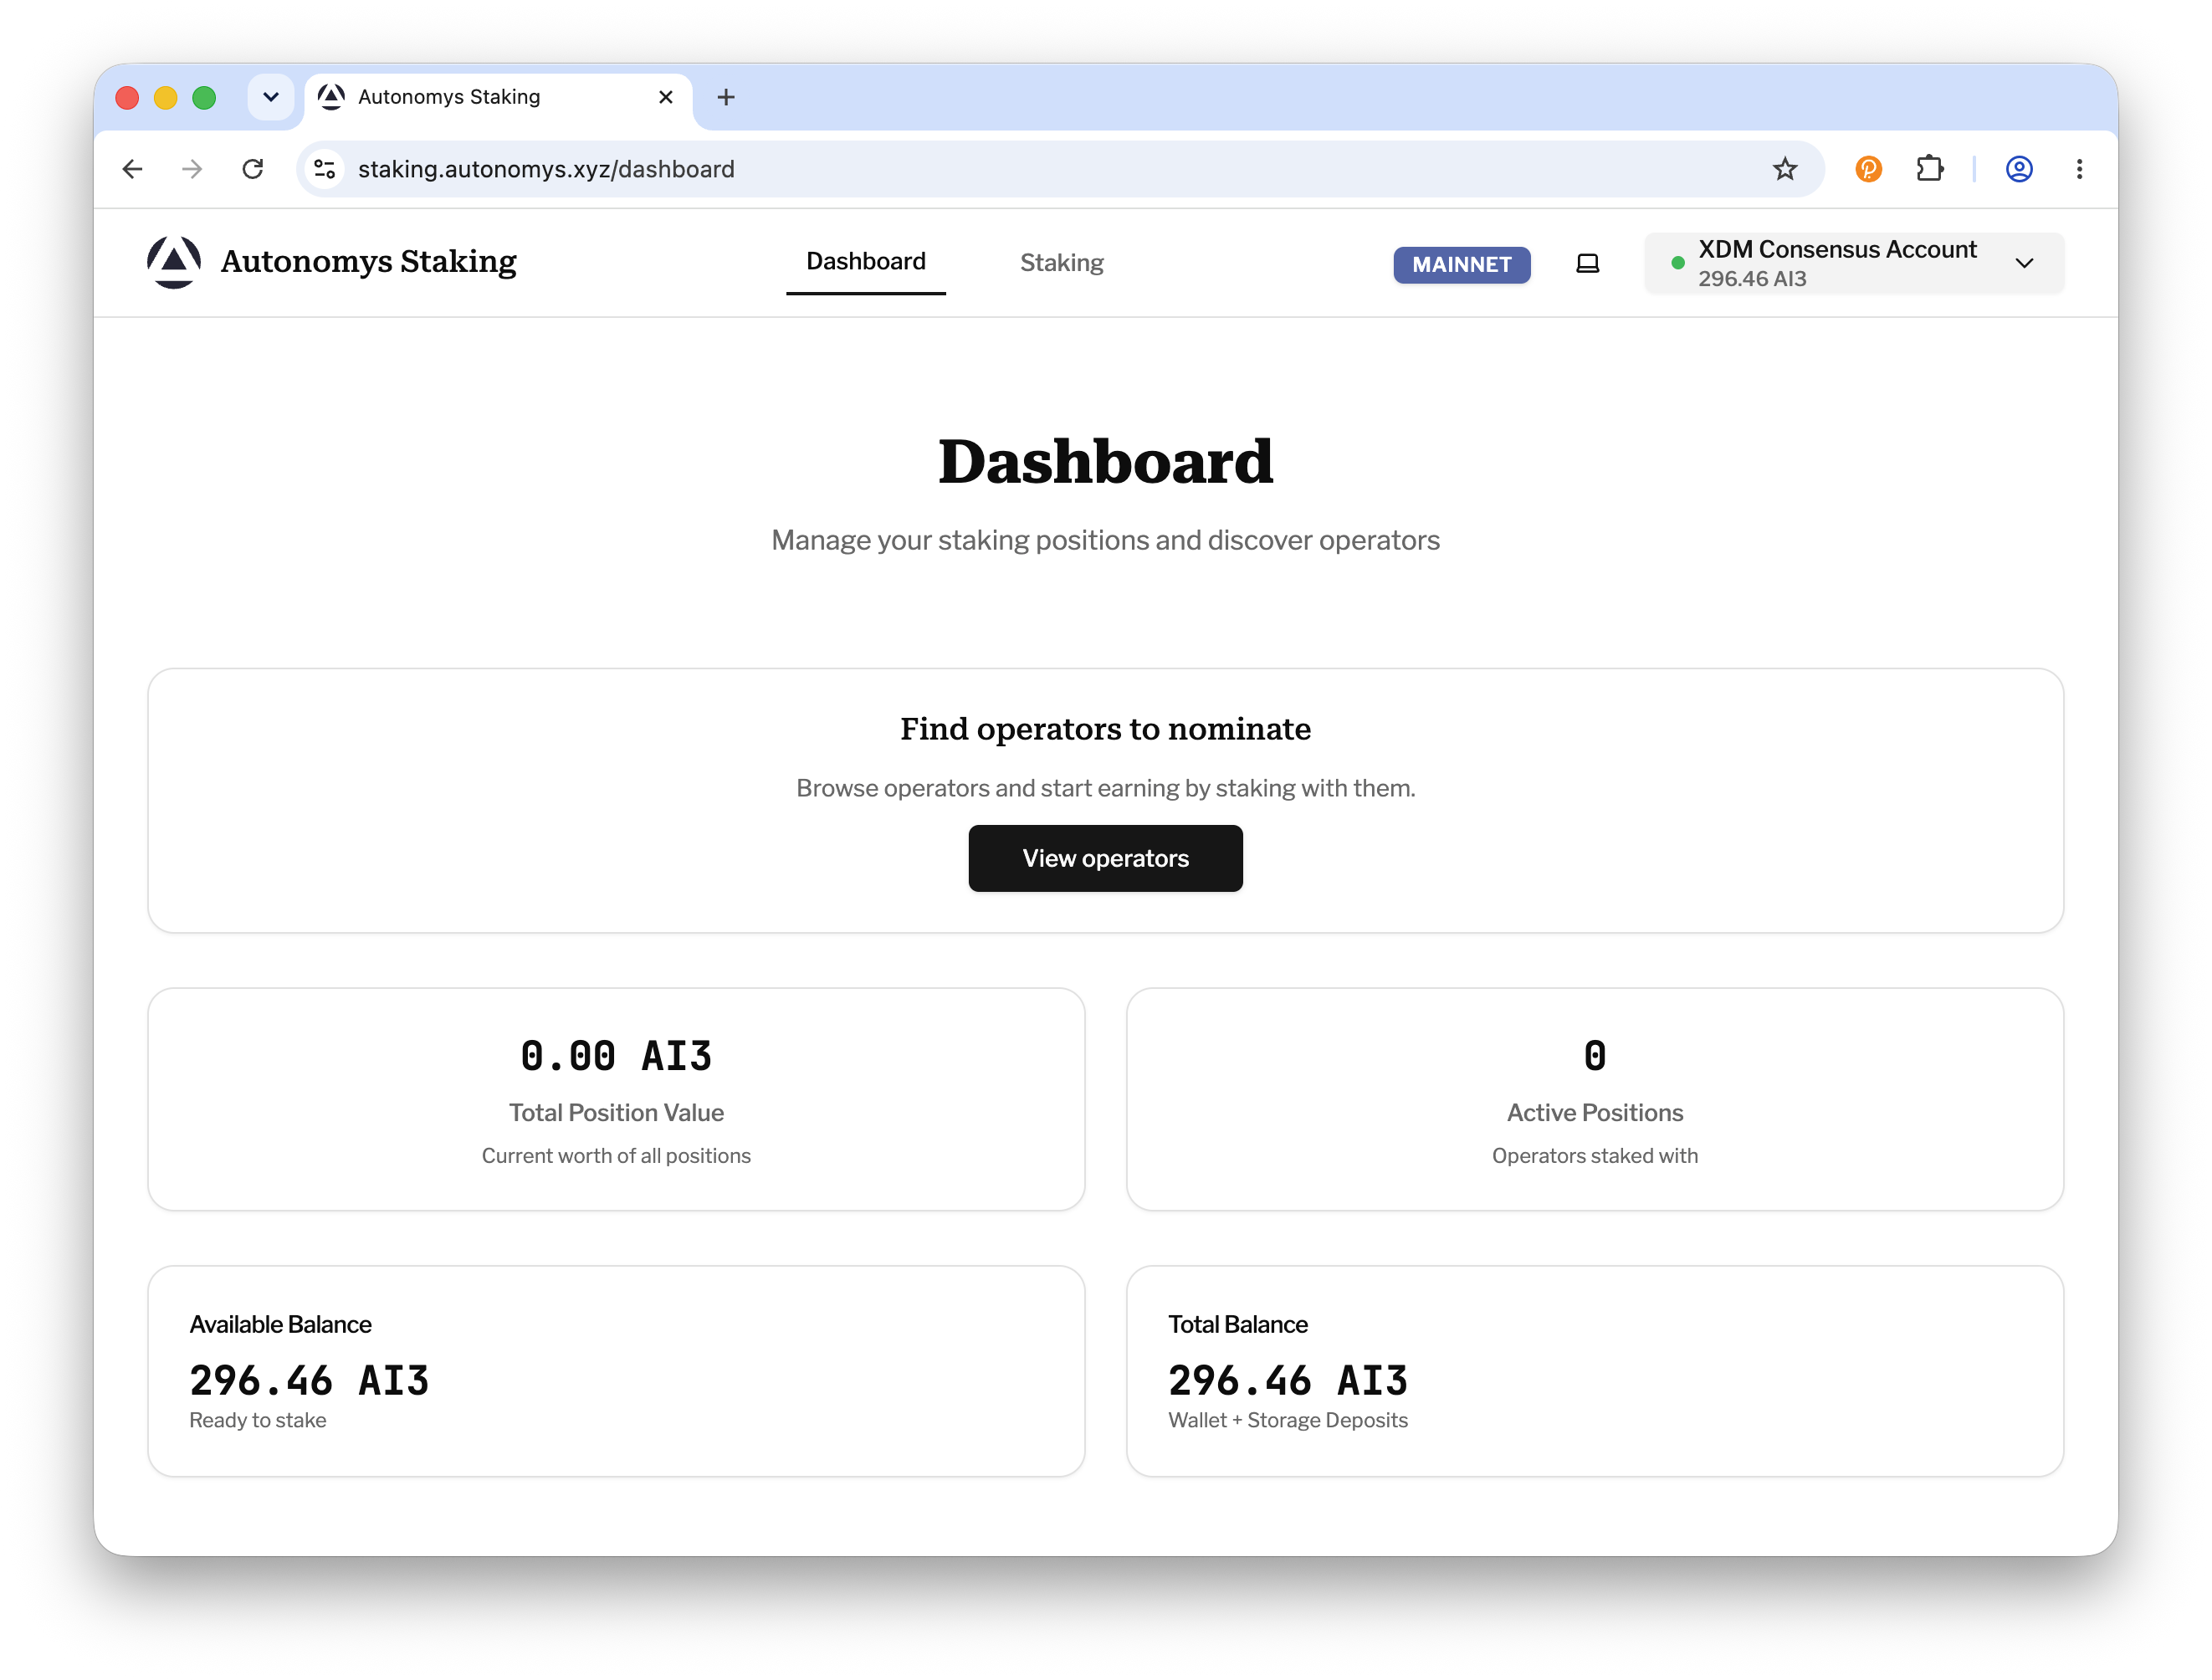
On success you'll see a Staking Successful! screen. Your stake appears as Pending on your Dashboard until the next epoch transition (~10 minutes), after which it becomes active and starts earning rewards. Rewards are automatically compounded - there is nothing to claim while you remain staked.
Success & Dashboard
Unstaking and withdrawing
Withdrawing your staked AI3 is a two-step process: request the withdrawal, then claim your funds after a locking period of roughly one day.
Step 1: Open your Dashboard and click "Withdraw"
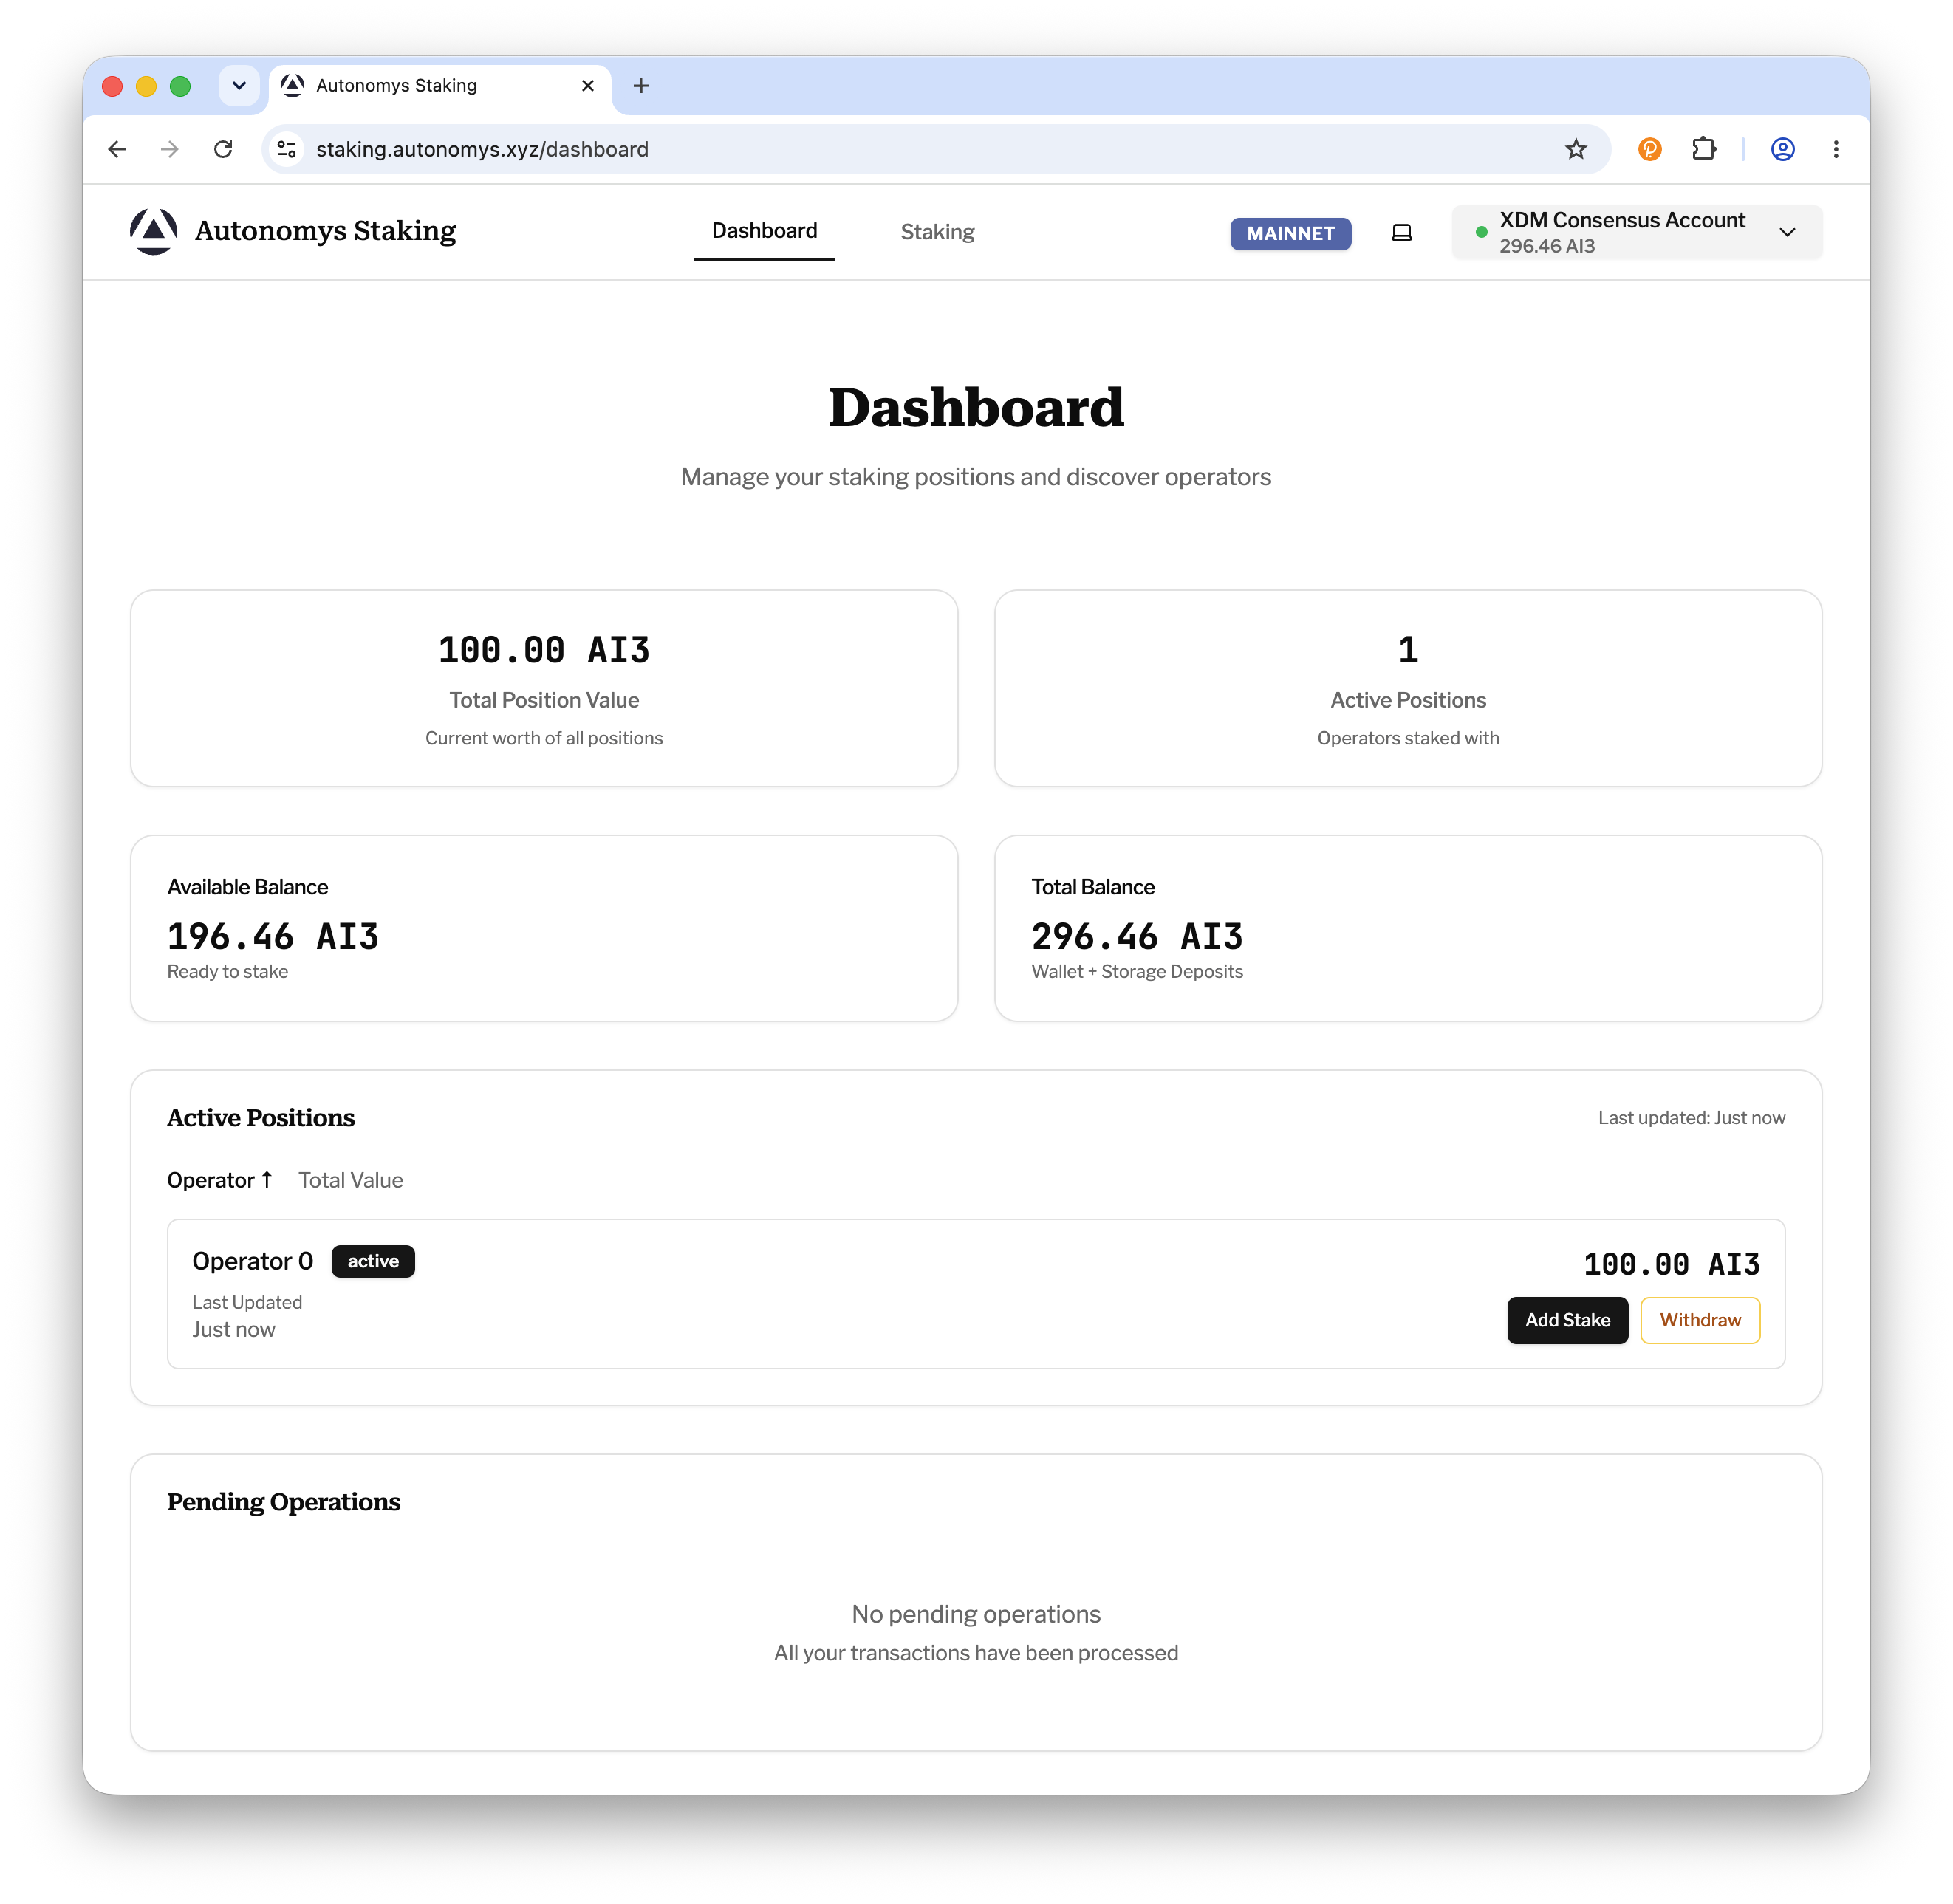
Go to the Dashboard with your wallet connected, find the position you want to exit in the Active Positions table, and click Withdraw.
Dashboard Withdraw

Step 2: Choose partial or full withdrawal
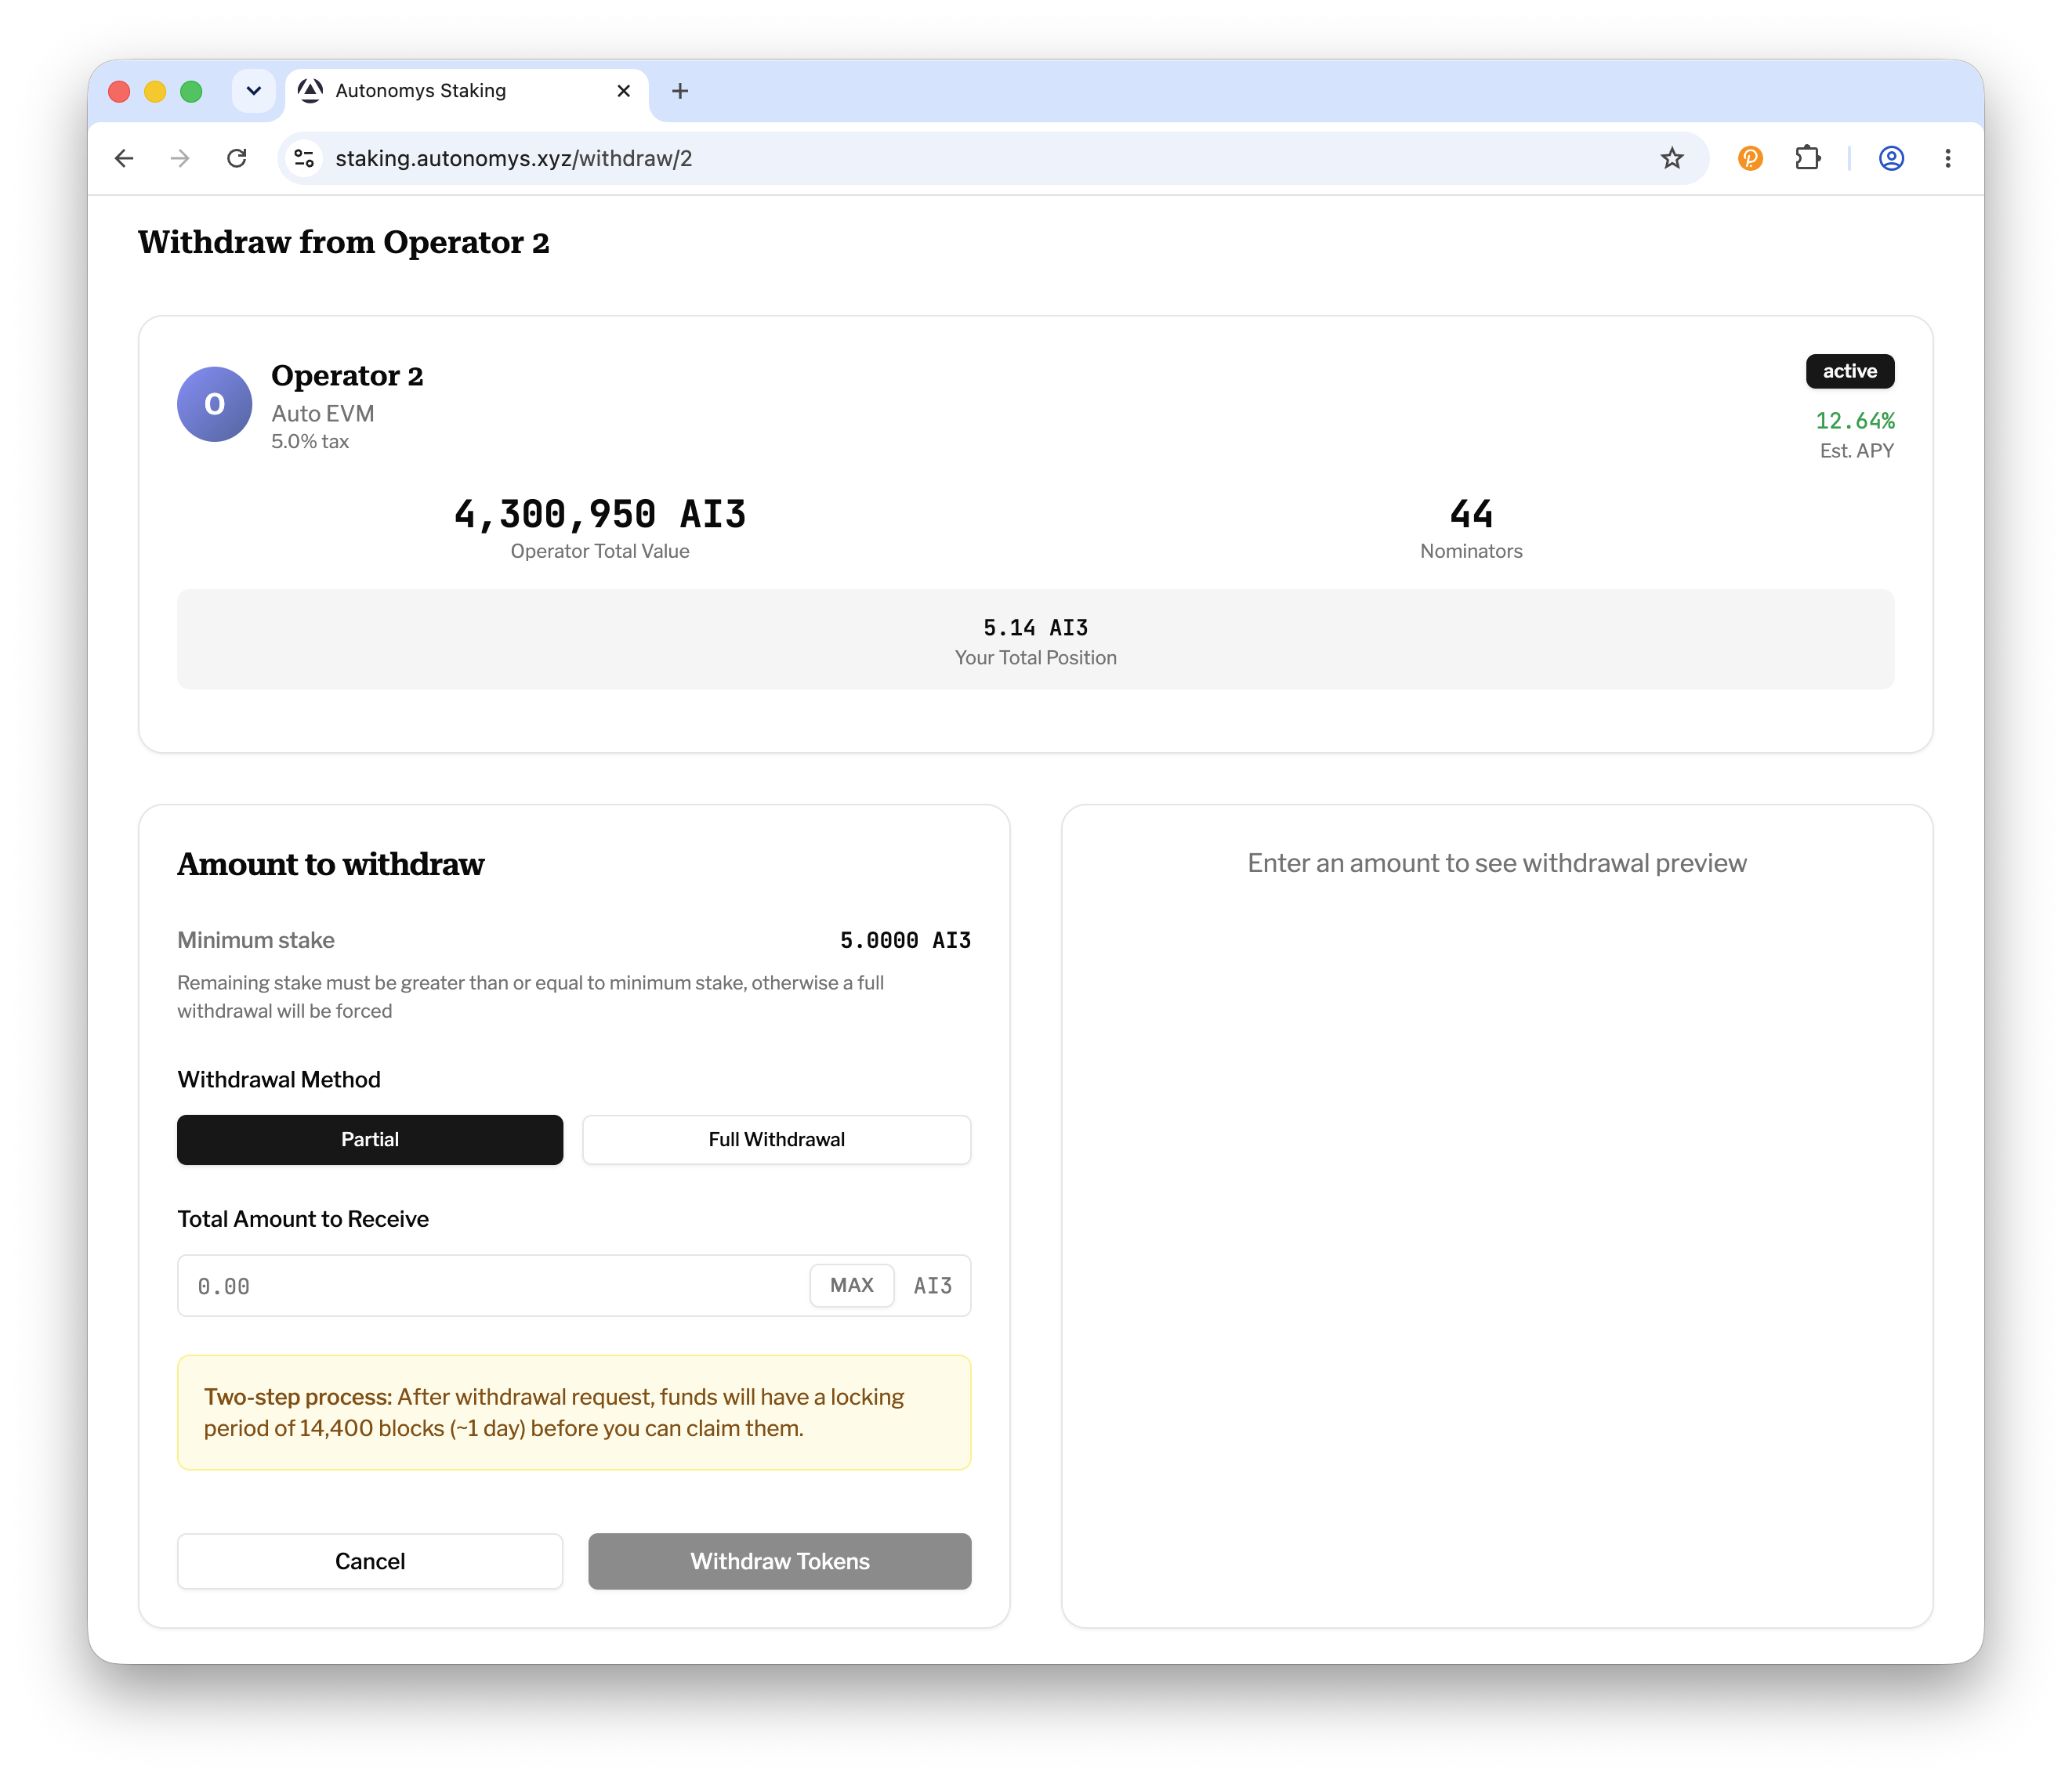
On the withdrawal page for that operator, choose a withdrawal method: Partial (enter the total amount you want to receive) or Full Withdrawal.
If a partial withdrawal would leave your remaining stake below the operator's minimum, the portal will warn you and convert it into a full withdrawal of your entire position.
Withdrawal Method
Step 3: Review the summary, submit and sign
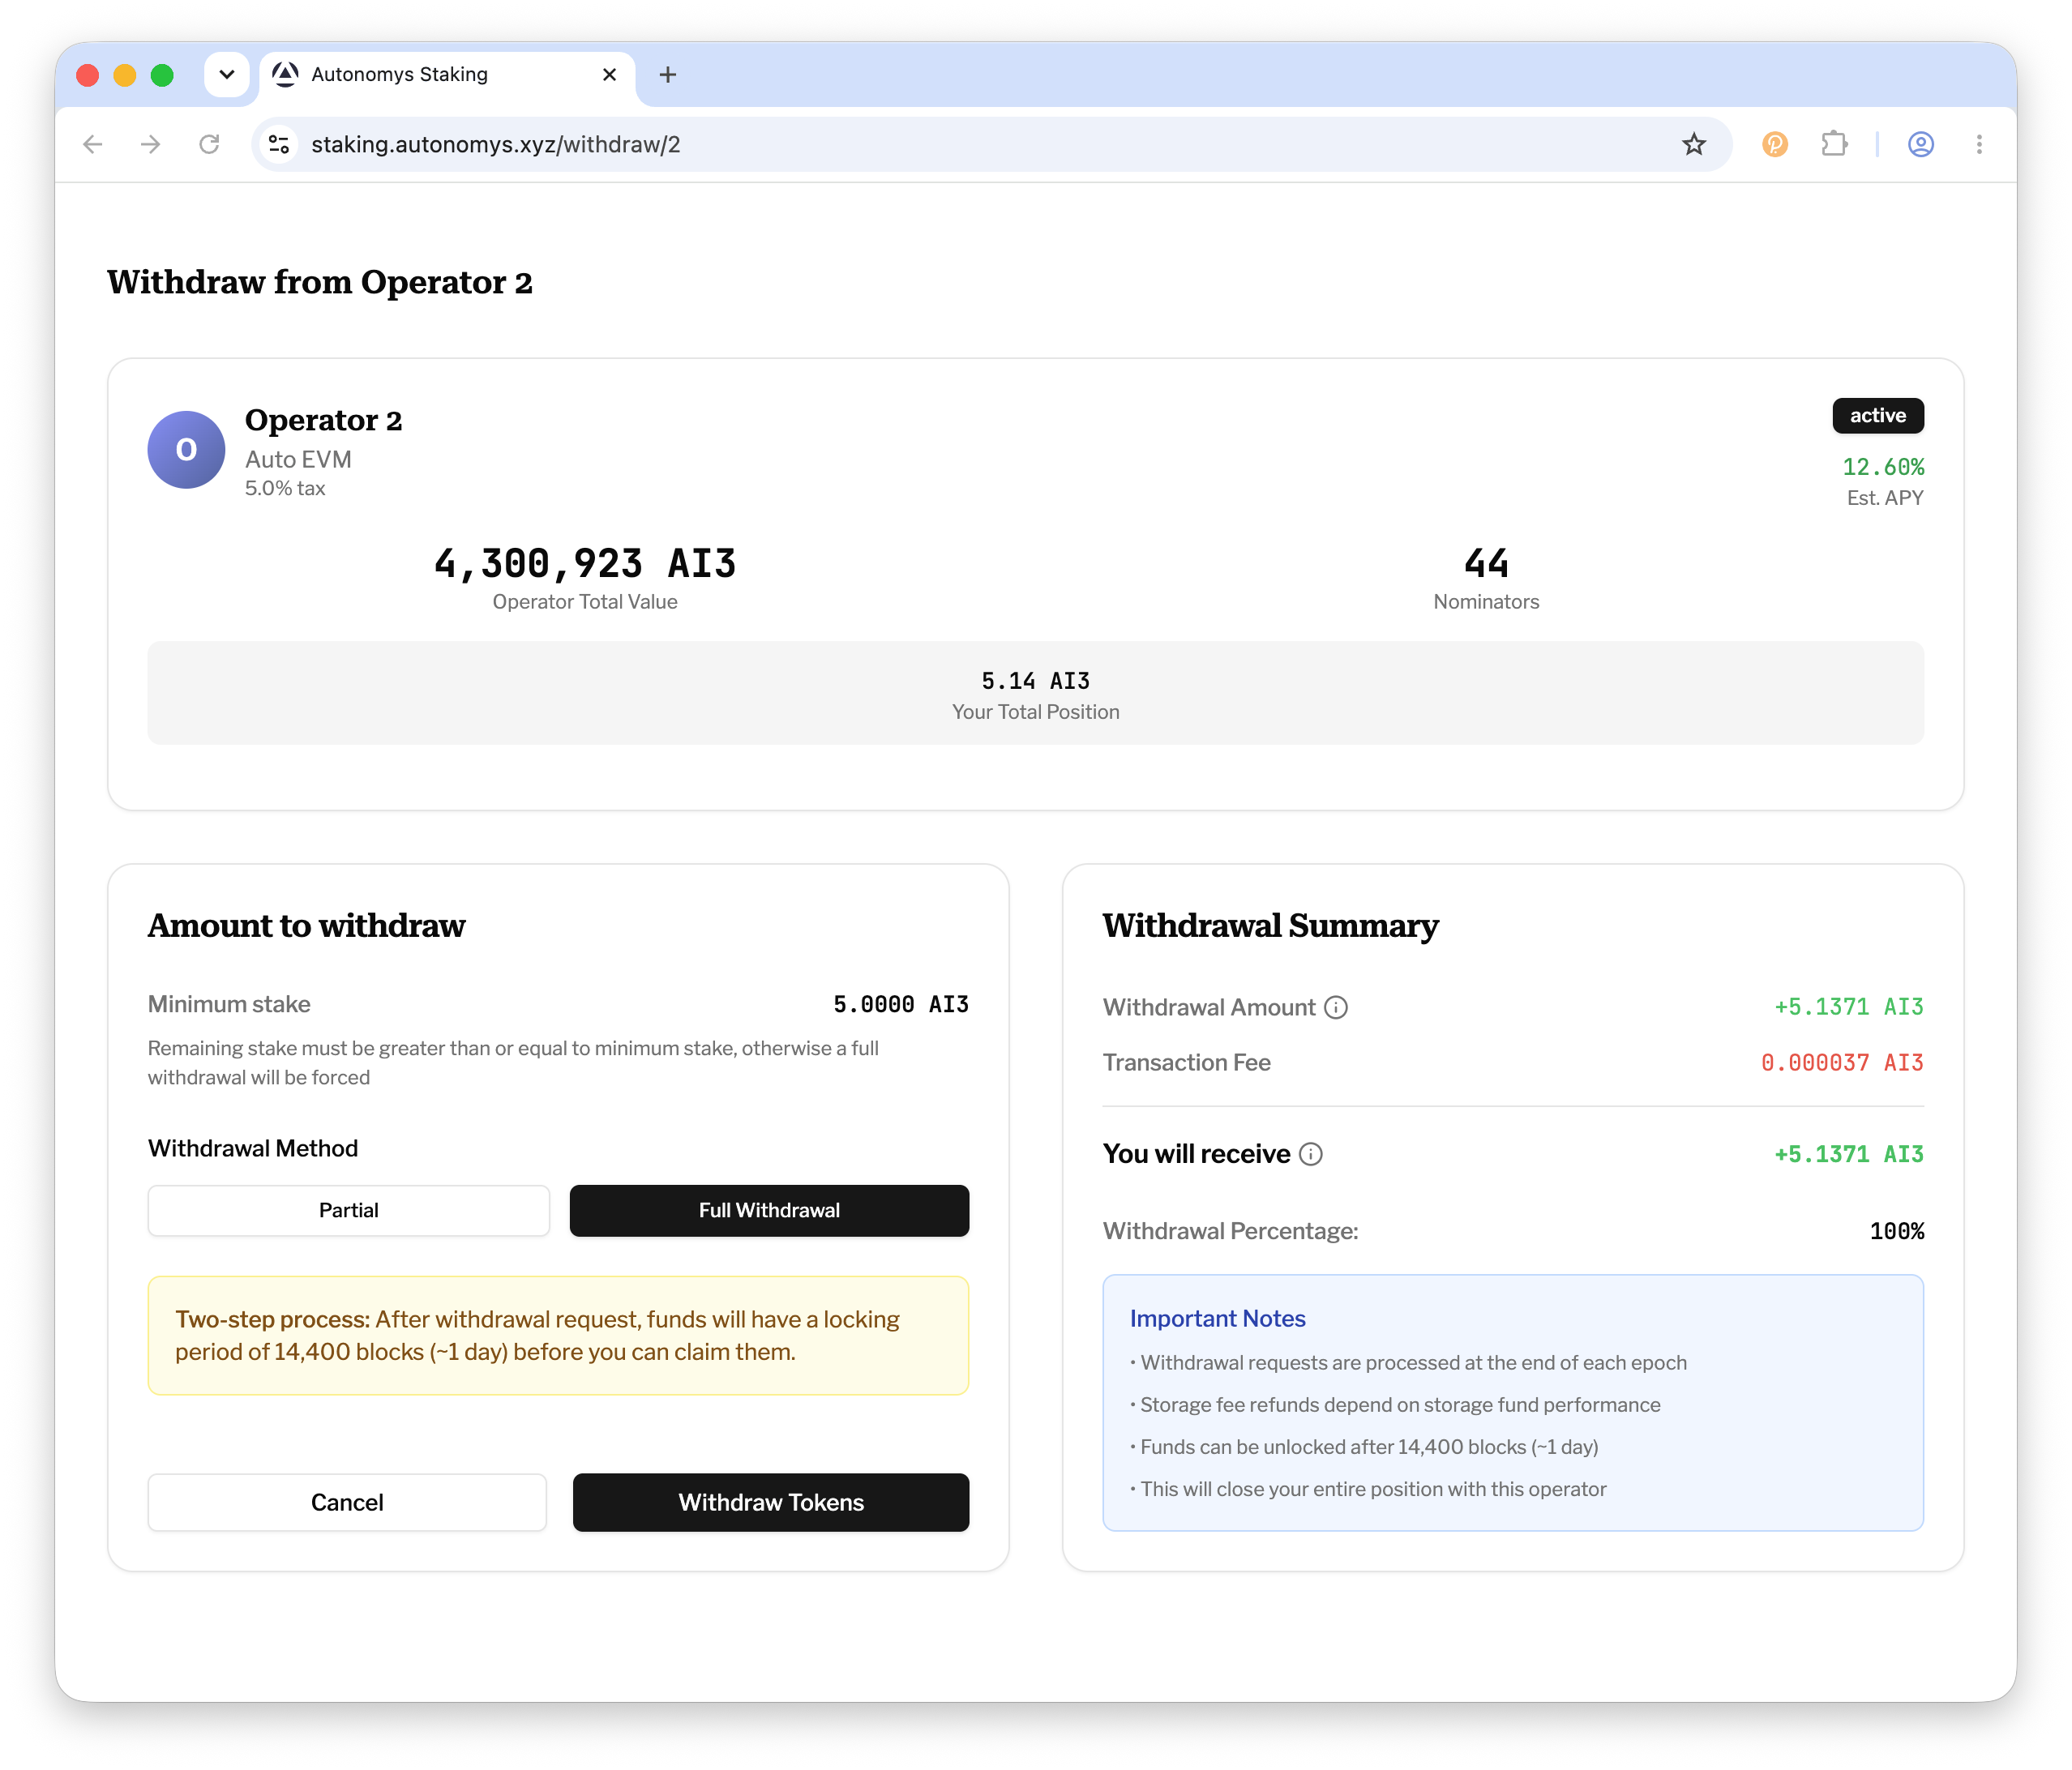
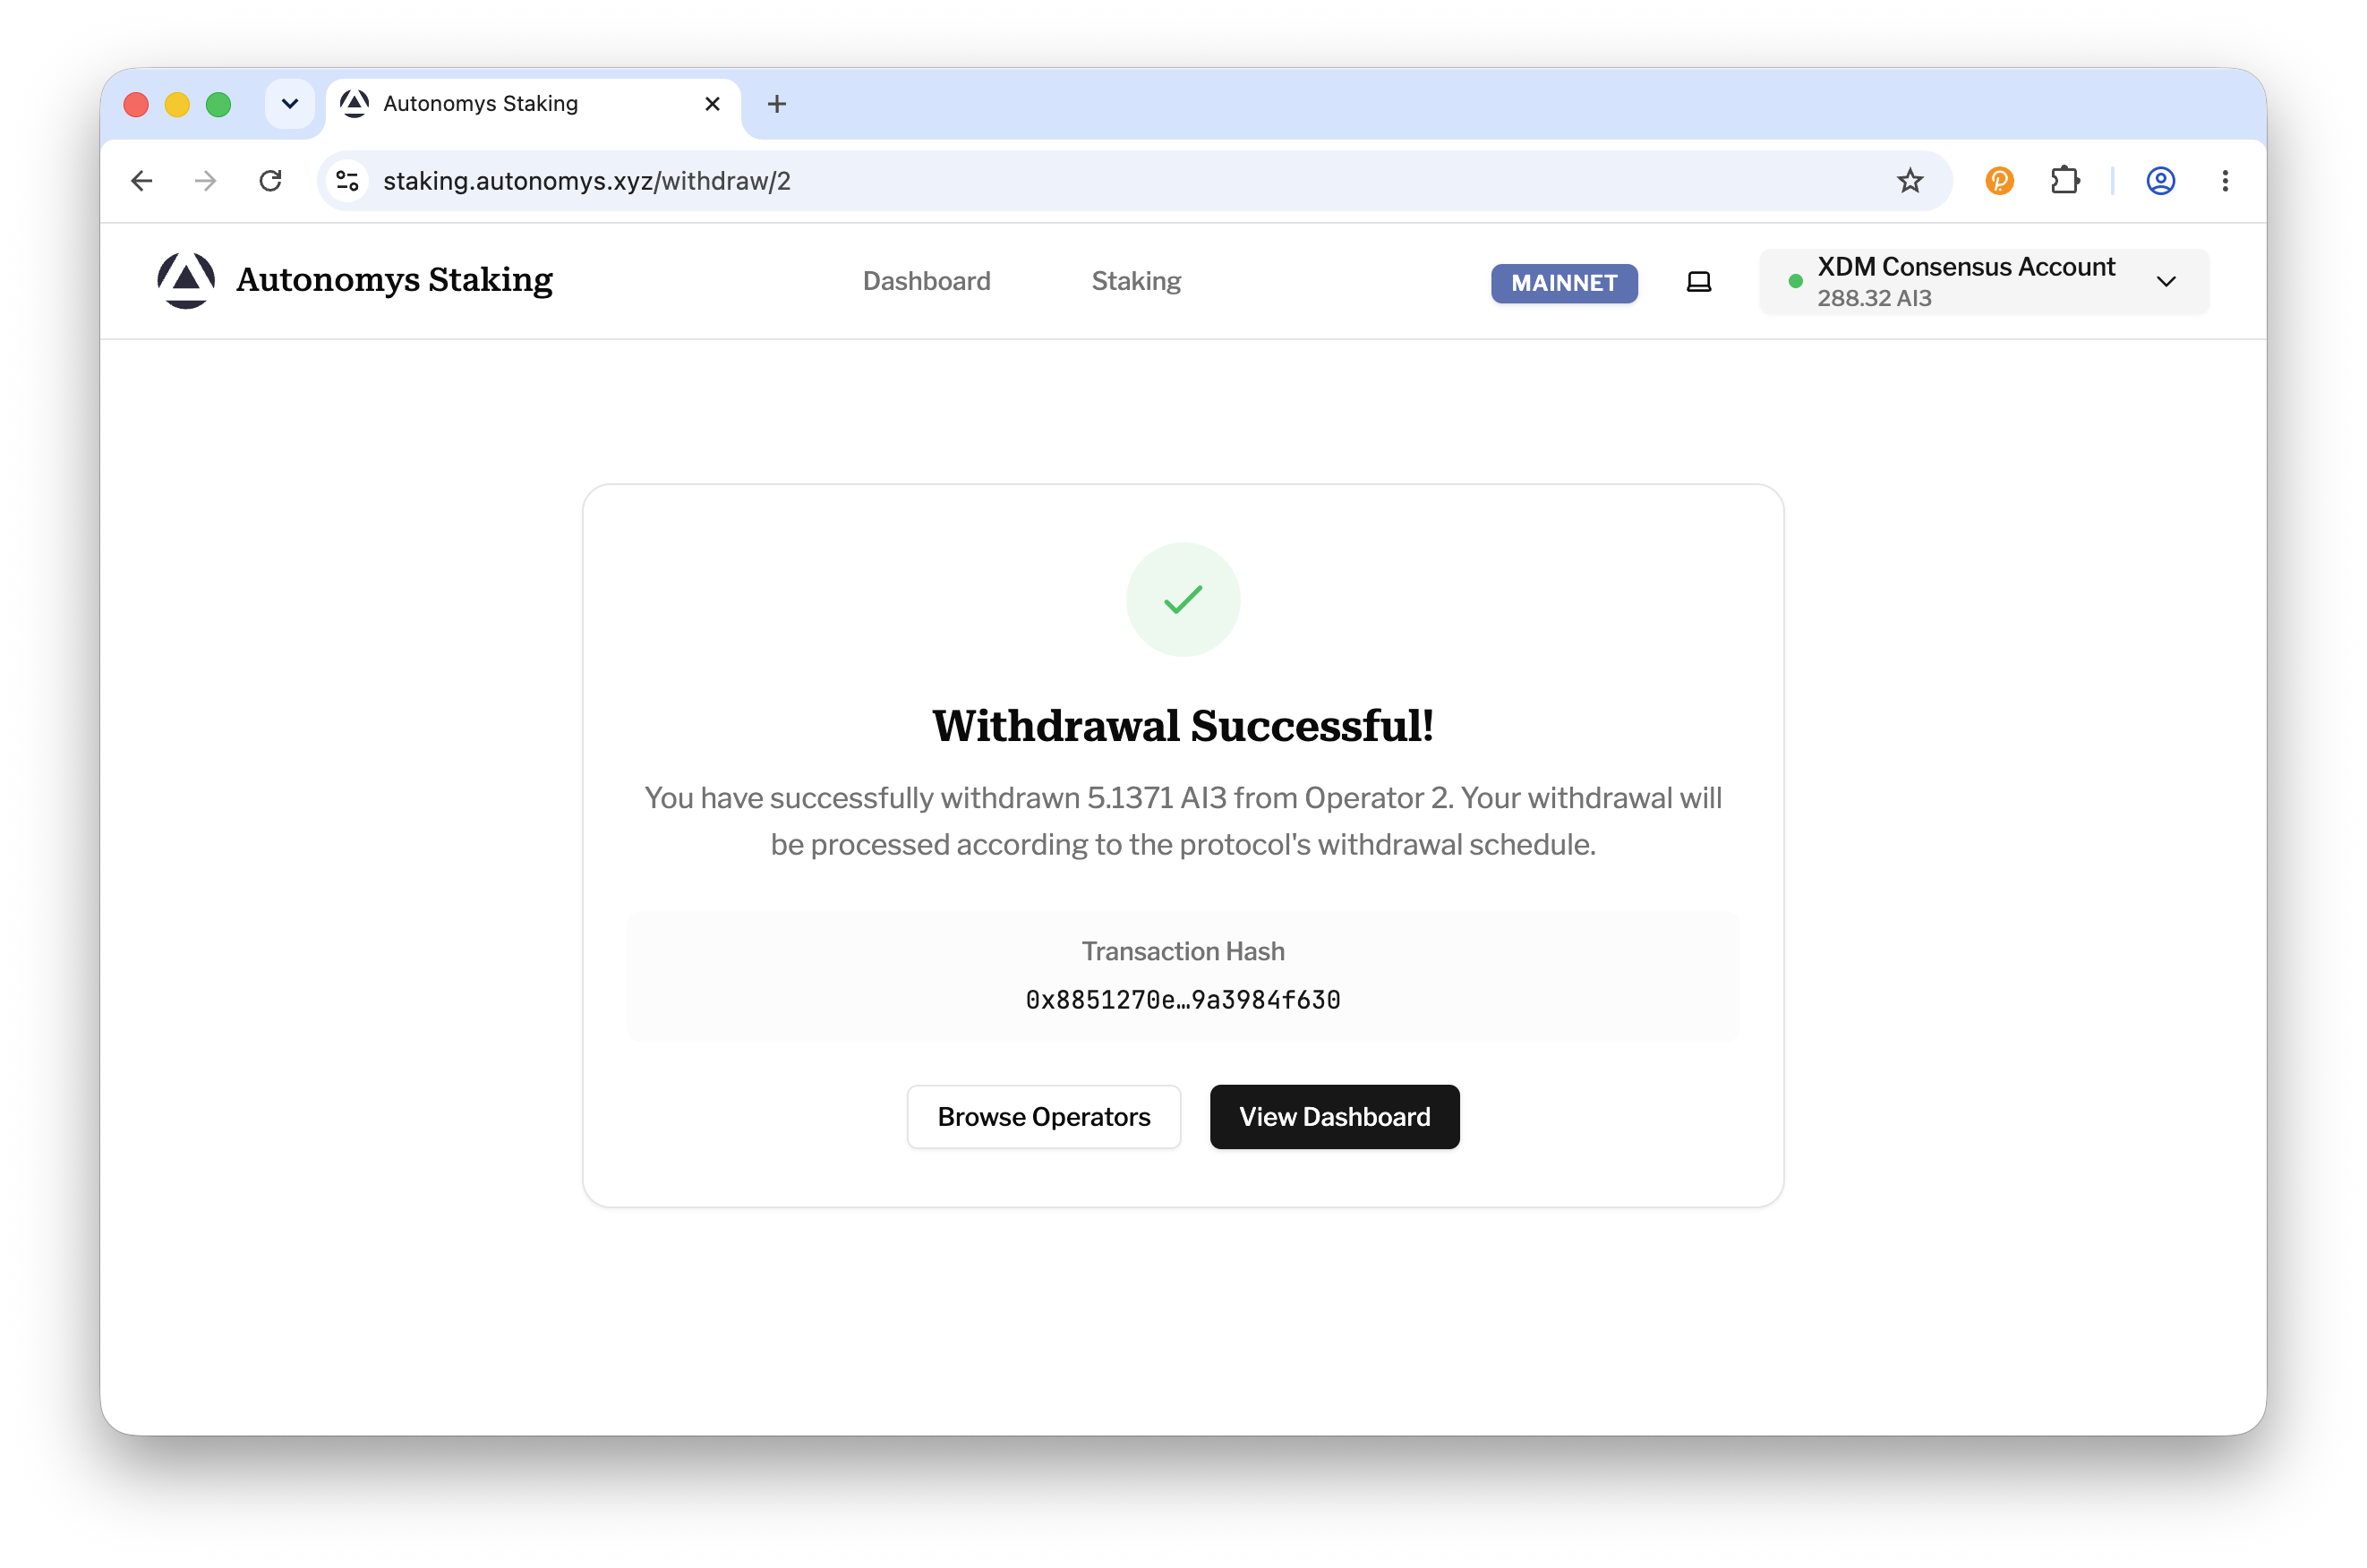
The Withdrawal Summary shows the amount you'll receive - including your proportional storage fund refund - and the transaction fee. Click Withdraw Tokens and sign the transaction in your wallet extension. On success you'll see a Withdrawal Successful! confirmation. Withdrawal requests are processed at the end of the current epoch.
Summary & Confirmation
Step 4: Wait for the locking period
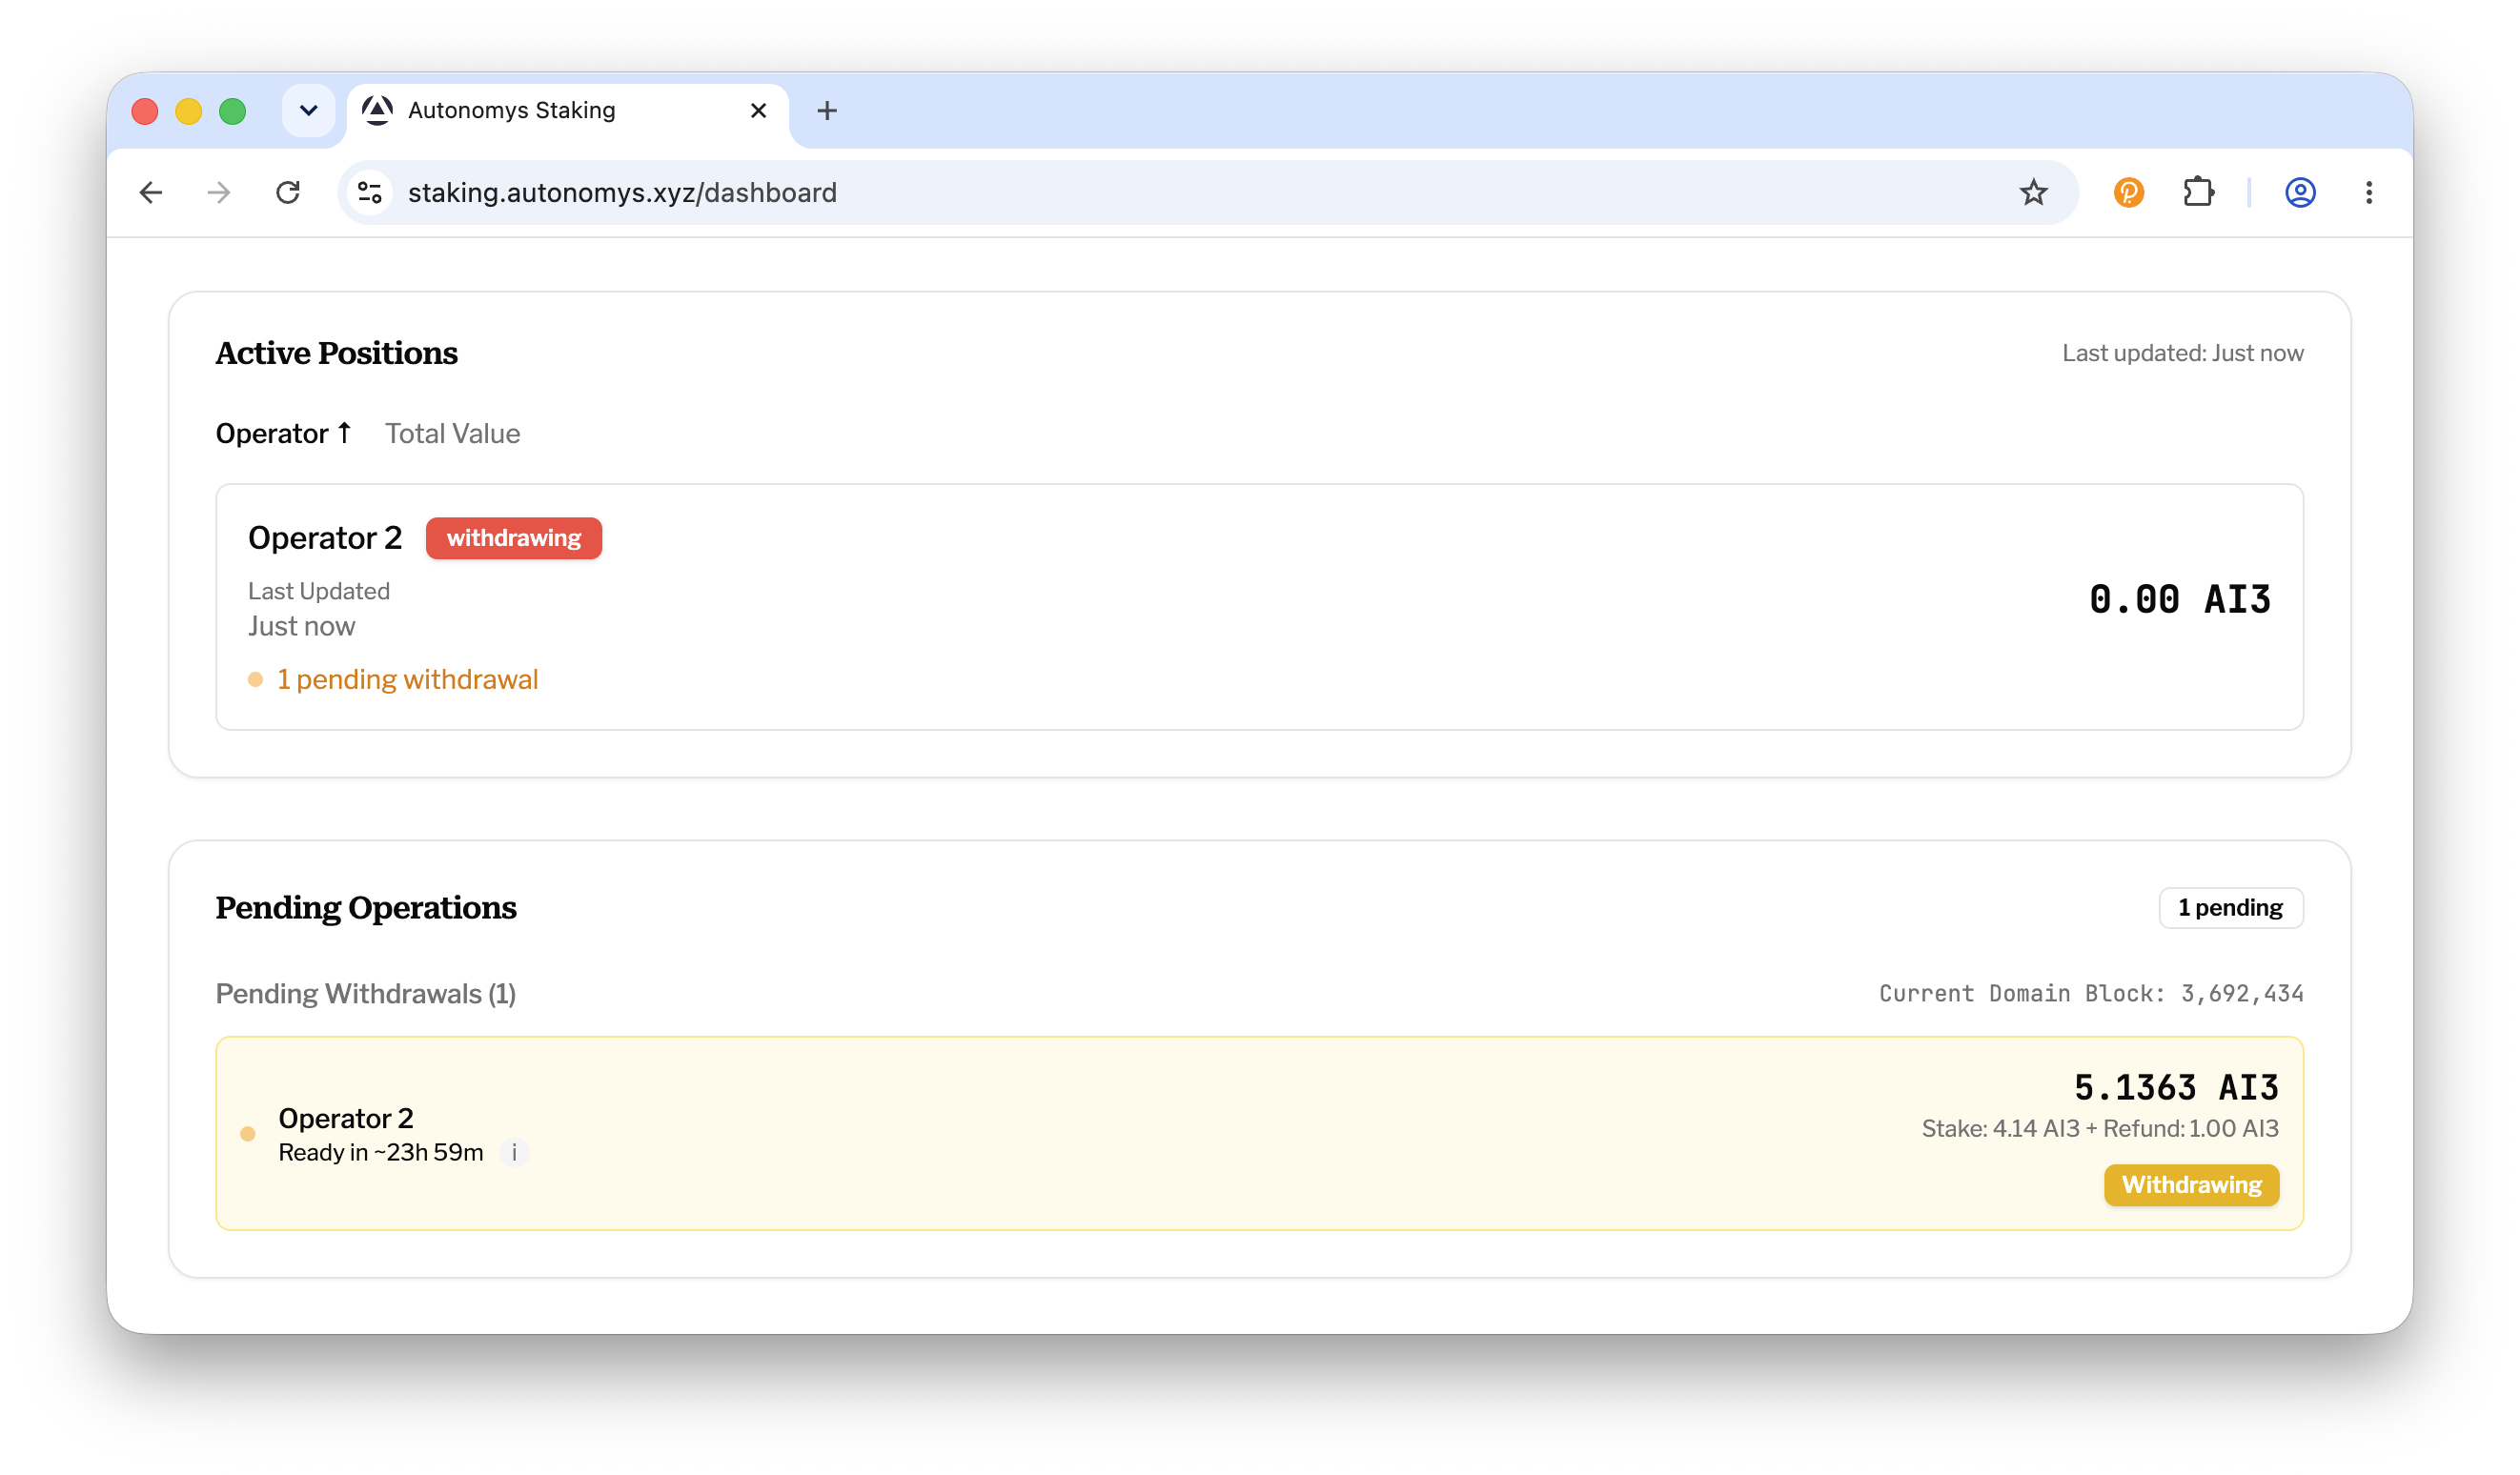
Withdrawn funds have a locking period of 14,400 domain blocks (~1 day) before they can be claimed. Track progress in the Pending Operations card on your Dashboard: the withdrawal shows as Withdrawing with a countdown (for example, Ready in 23 hours 59 minutes), then changes to Unlockable when ready.
Pending Operations
Step 5: Claim your funds
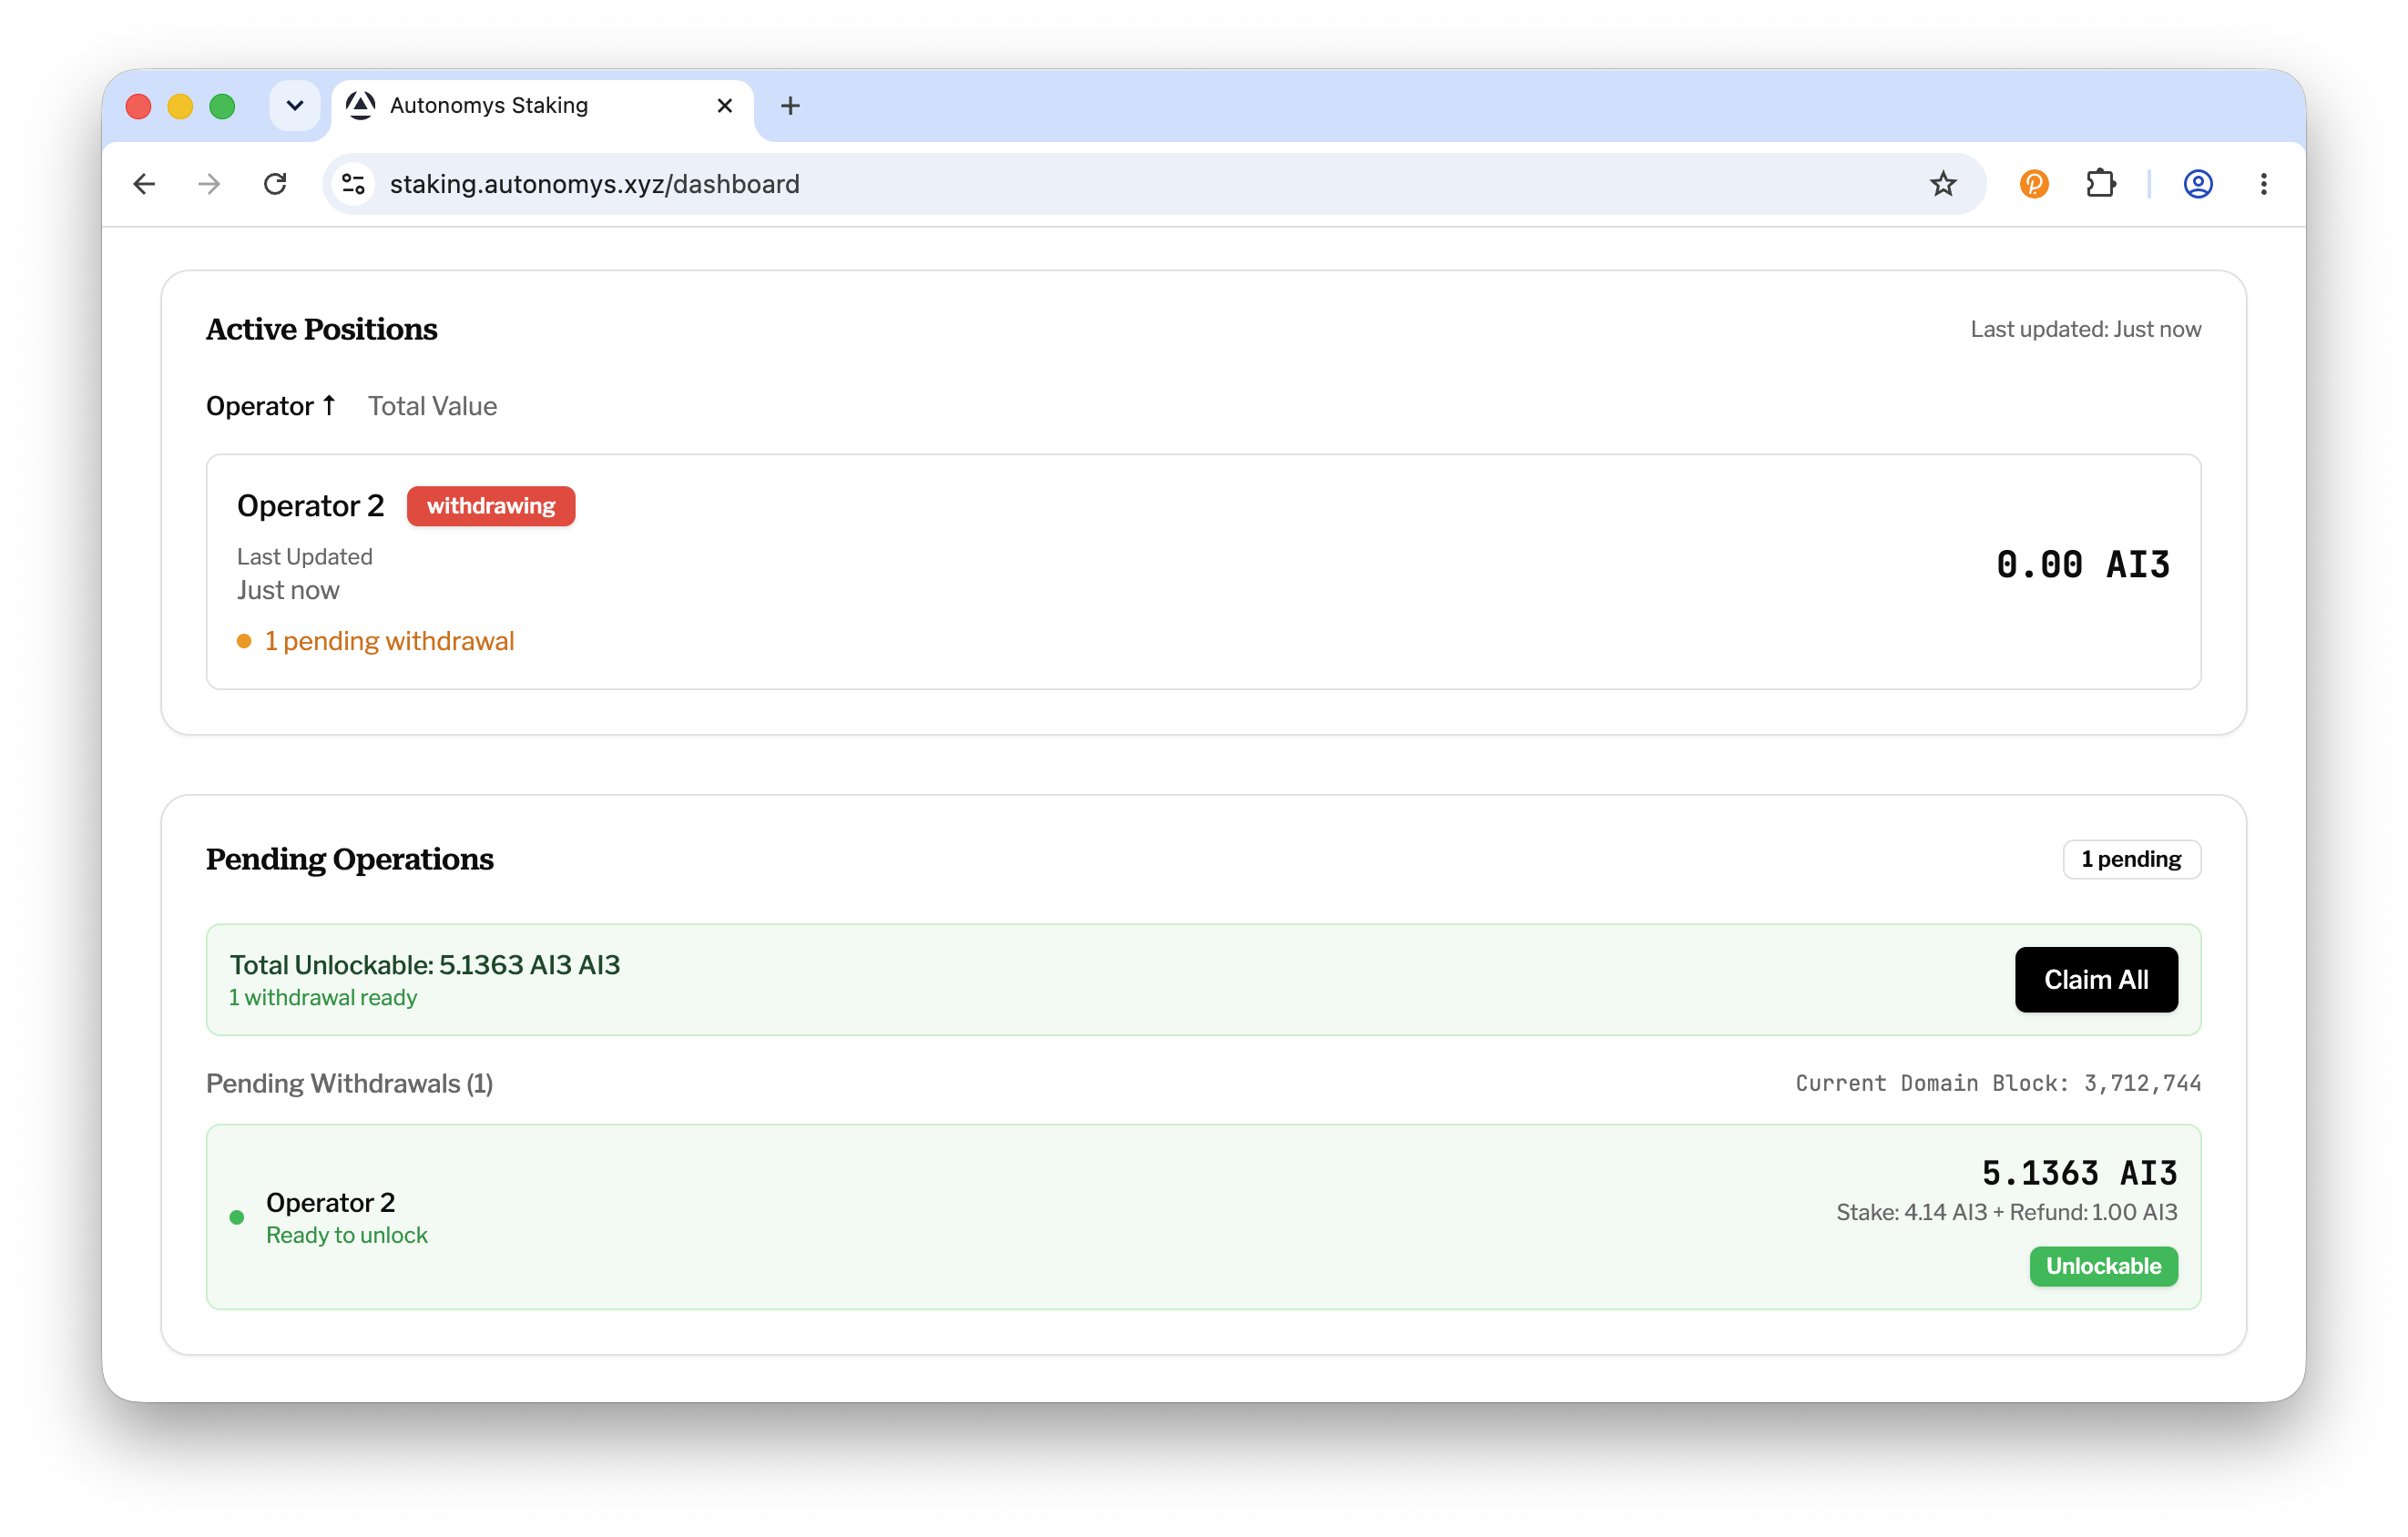
Once your withdrawal shows as Unlockable, a summary appears with the total amount ready. Click Claim All and sign the transaction. Your AI3 - including the storage fund refund - is returned to your wallet's available balance.
Claim Funds
- Request the withdrawal - processed at the end of the current epoch (~10 minutes).
- Wait the locking period - 14,400 domain blocks (~1 day).
- Claim your funds with the Claim All button on the Dashboard.
In total, expect roughly one day between requesting a withdrawal and having the funds back in your wallet.